DIY Basement Renovation - Step-by-Step Guide
I'm excited to show you our latest house project today! It's a home gym in our newly converted basement room. We moved into our home nine years ago and had almost the whole house renovated within five years, doing much of the work ourselves to save on costs. When we came to look round, the basement was one of the things that we loved the most.
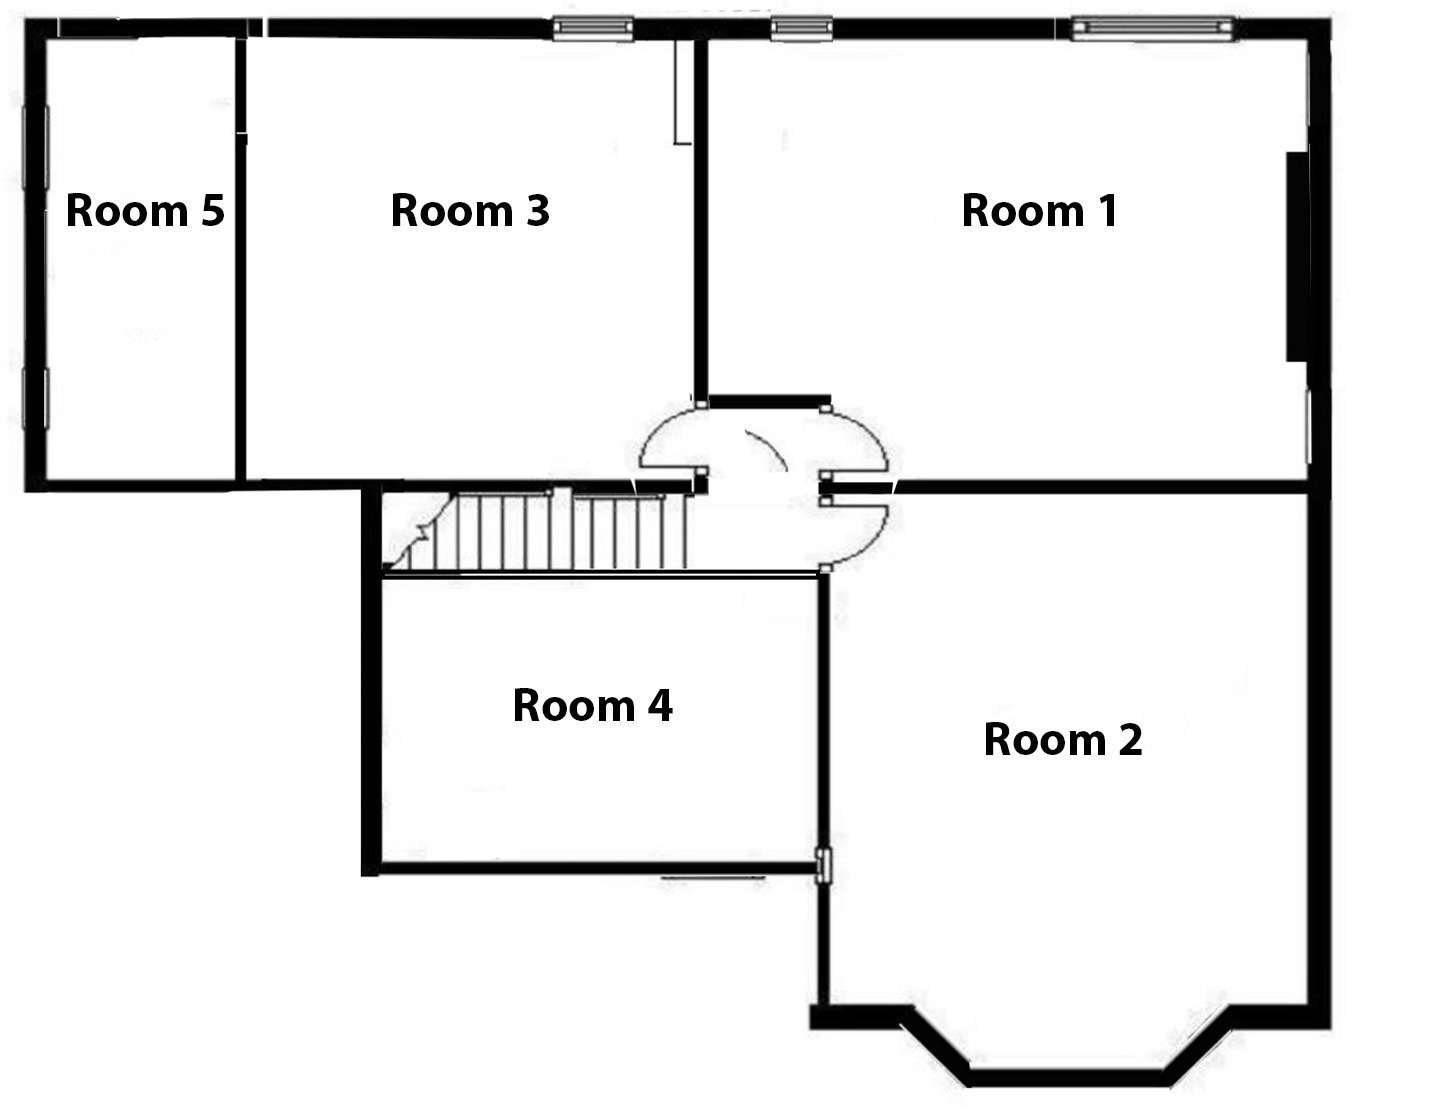
Our basement floor plan
Large basements provide so much scope for future improvements. Although it was unconverted, the entire basement had a good head height and spanned the whole footprint of the house, containing three great sized rooms as well as a couple of smaller ones. We saw its potential for unlocking extra space straightaway. Room 1 was converted as part of the initial renovation and it's become valuable extra living space, as well as a game room for the boys.
It went from this:
to this:

Update: We have recently given this games room a colourful refresh!
Room 2 currently houses a golf simulator 🙄 (it's a bit like golfing in a cave) so I'm more than happy for that to remain unconverted.
Room 3
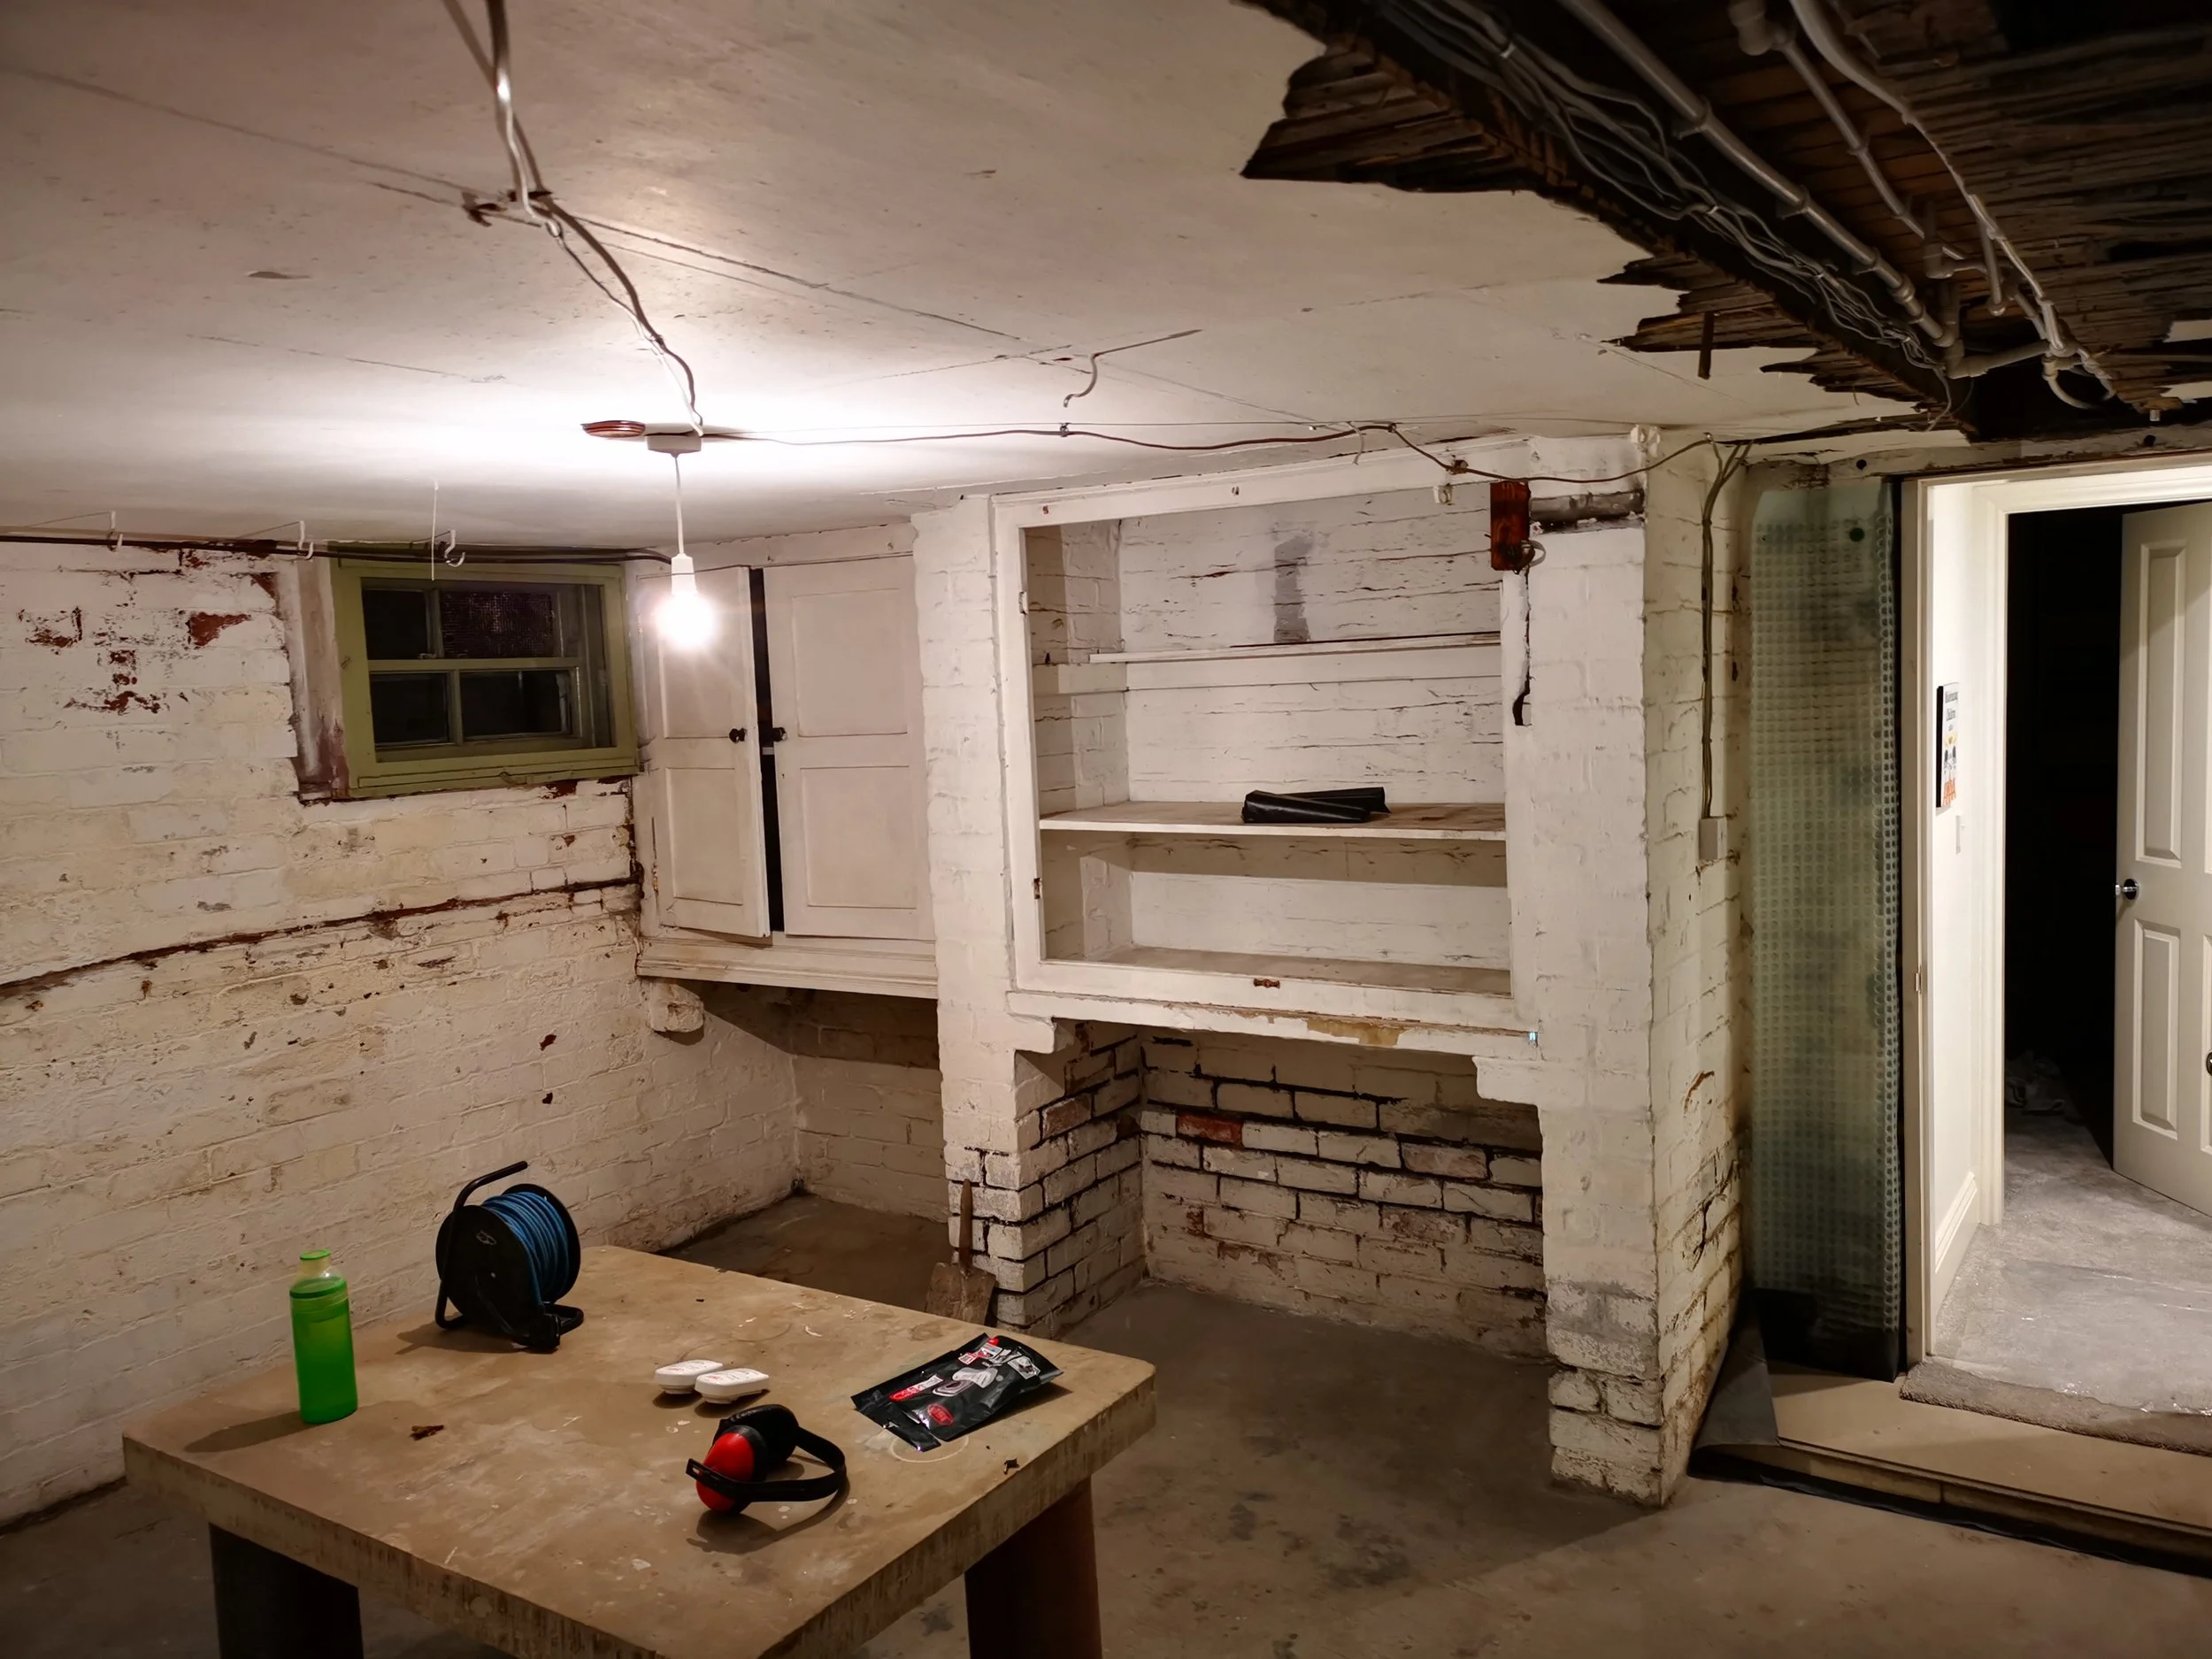
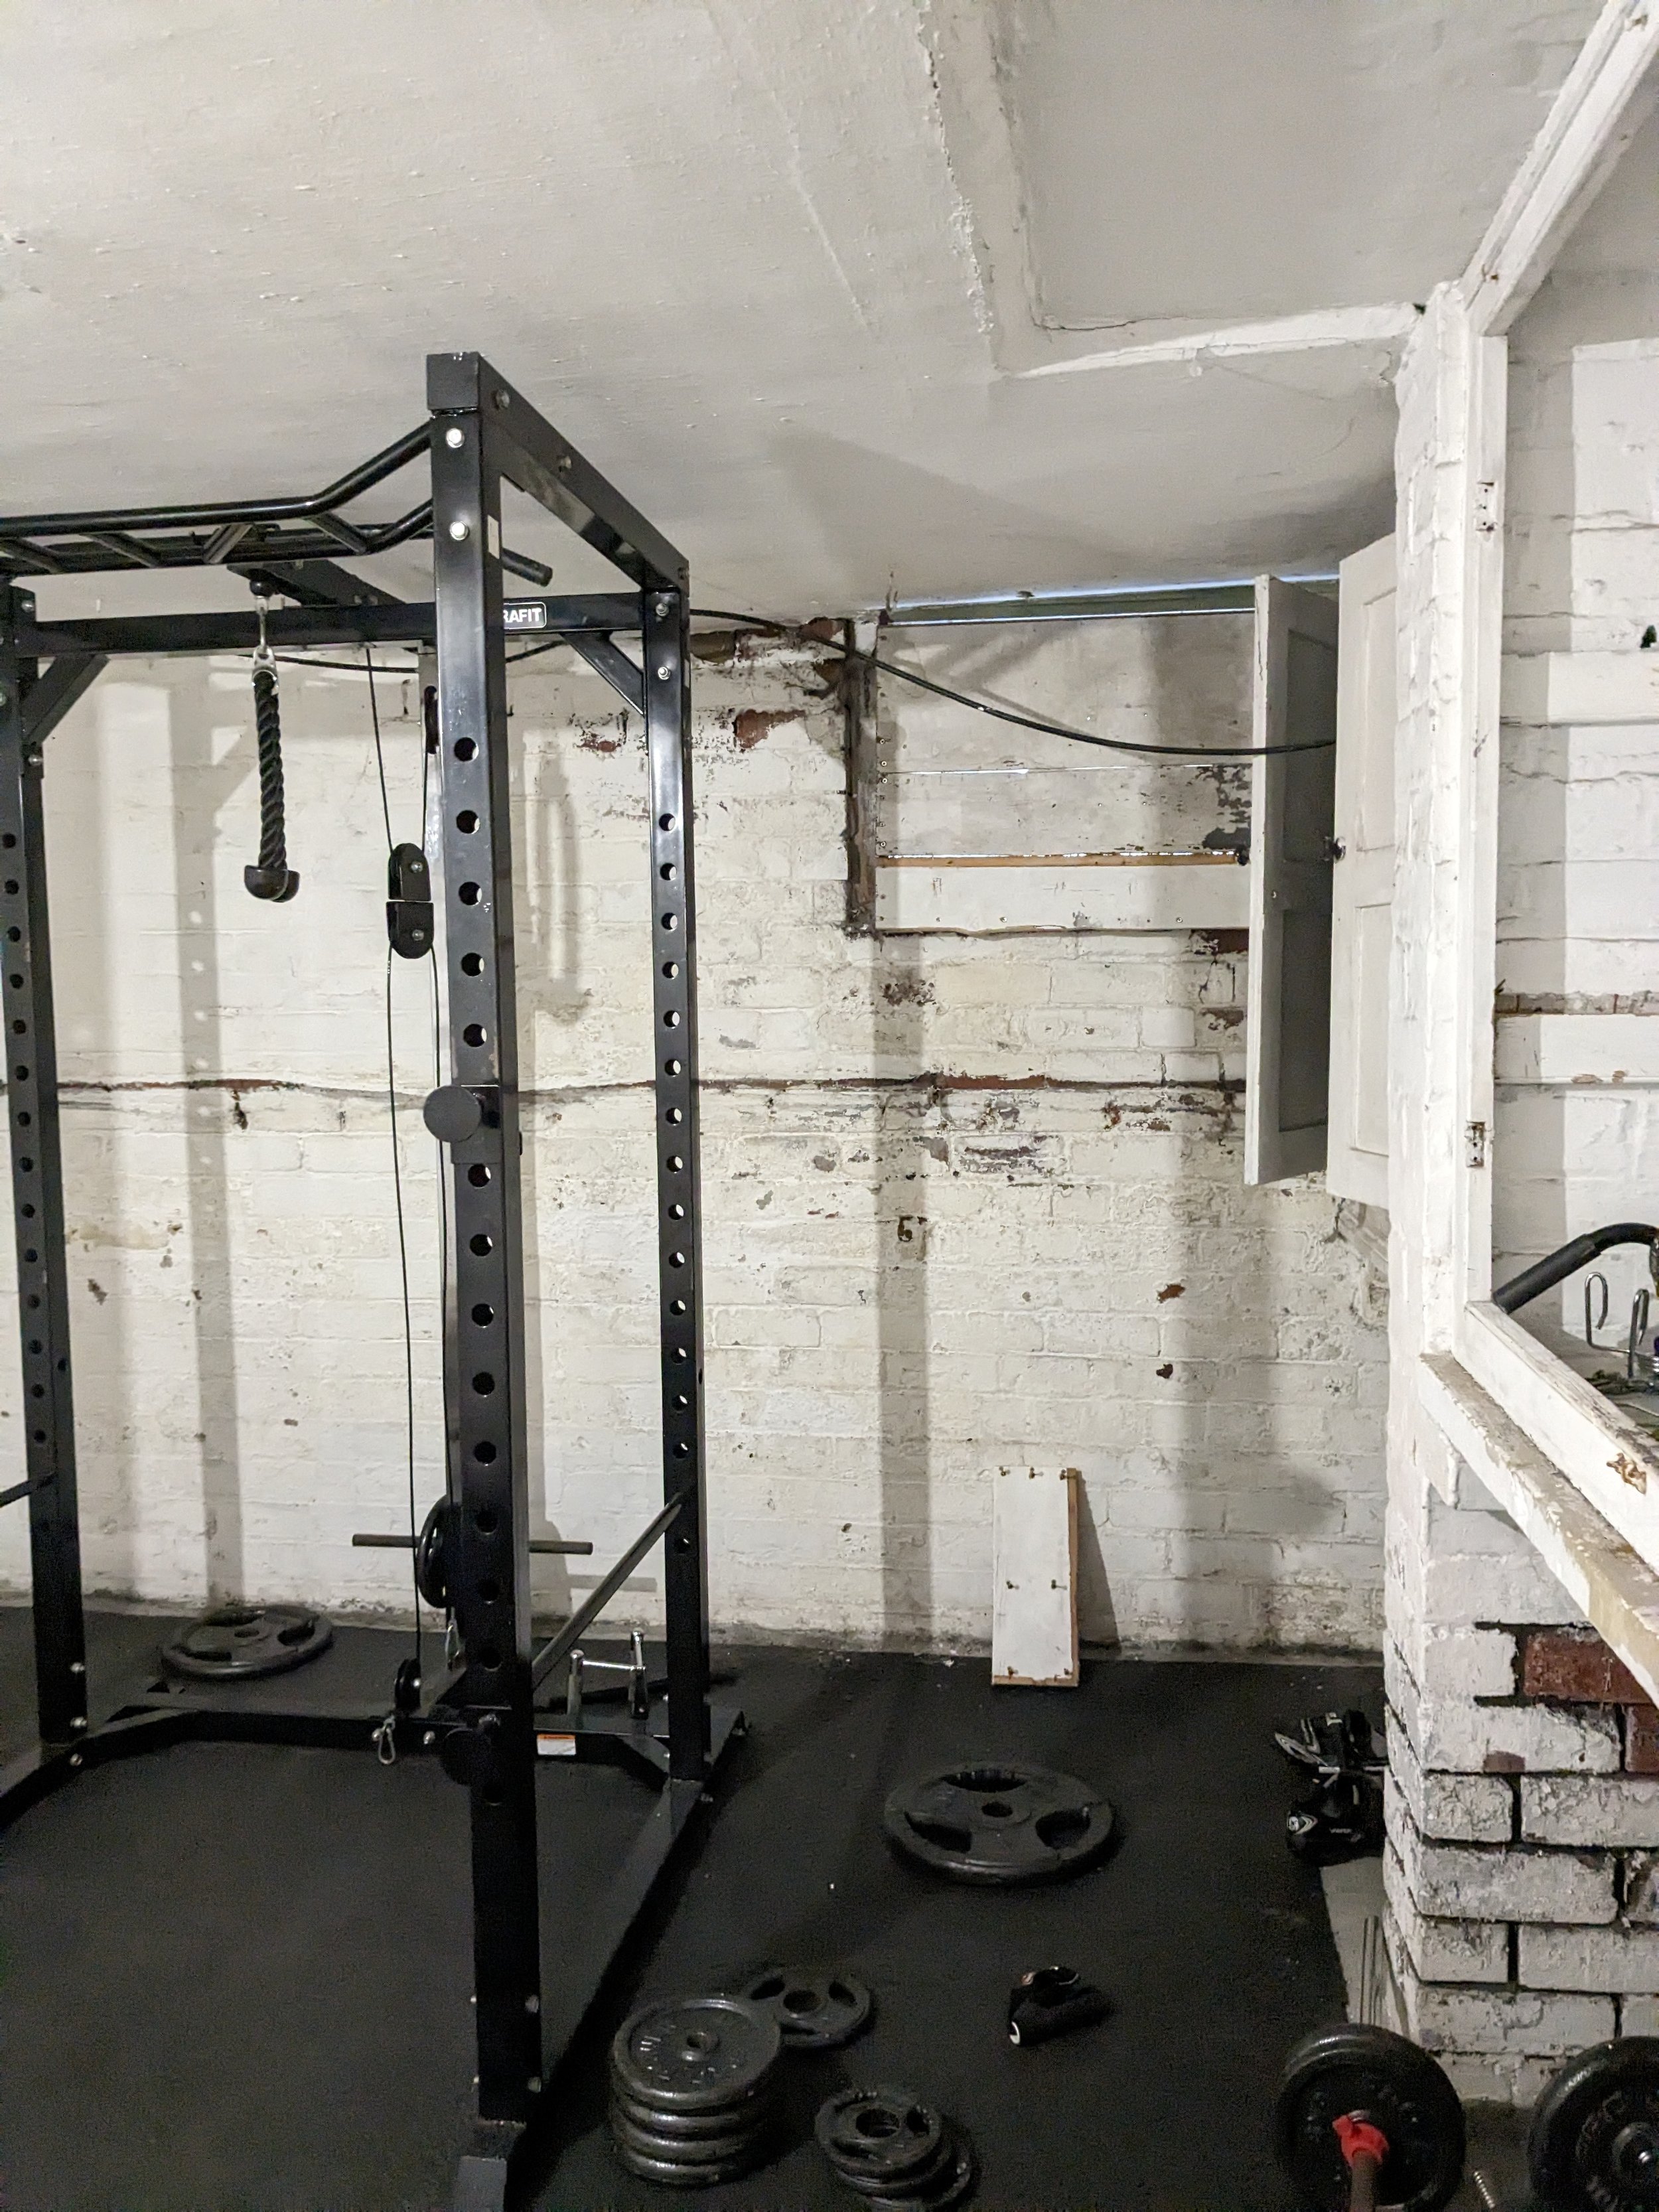
Room 3 measures 3.9m x 4.1m (approx 16.8 square metres or 55 square foot) and it was originally used as a food store in Edwardian times. When we moved in, there was a big stone table which would have been used as a fridge. And see the hooks in the ceiling where they hung the meat?! We had already started using it as a very sad gym so this is the room we decided to convert next.
Oliver learned so much from our renovation that he's quite skilled in most trades and he also has all of the required tools for DIY projects. Basement remodel projects can be expensive. According to checkatrade.com, the cost of the full remodel of a basement is £1,000 - £2,200 per square metre +VAT. Taking the average of this range means this room would have cost on average around £26,680 +VAT to convert - quite a significant amount of money! We planned for Oliver to do all of the work apart from the skimming and sorting the new window. The total cost (not including the TV/speakers, gym equipment or furniture) was….wait for it…….£4k!!! Converting a basement yourself as opposed to getting a company in means a HUGE difference in price!
The very sad gym - not a very nice place to be exercising on a cold winter’s day or indeed any day
The conversion took eight weeks in total. Bearing in mind his day job is in IT and he only worked on this at evenings and weekends, that's not bad going! I did the usual to-ing and fro-ing to Screwfix and Toolstation at all times of day and night, and I also of course provided the creative ideas.
I think people hear the words 'basement conversion' and automatically think it's a really complicated job. Obviously you need decent DIY skills but Oliver is adamant that it’s no more difficult than other projects he worked on during our renovation. I'm going to talk you through the process we followed and I’ll show you the cost breakdown.
Building regulations approval
If you're starting a basement conversion, you'll need to get building regulations approval from your local council. I submitted a building notice which is a much simpler form to fill in than going down the full plans route. Because the total cost of the project was under £5,000, the application cost £165. Once you've applied, you'll be assigned a building control officer who will come and talk through your plans before you start. Building regulations change all the time so they advise on the type of insulation etc. that you'll need to use. They also let you know at which points they'll need to come back to inspect the work, and at the end of the project they do a final visit when they sign everything off. Our officer was really helpful and was always on hand to offer advice whenever we needed to check anything.
Planning permission is also needed if you're going to be changing the external appearance of the property or if the basement is going to become a separate dwelling. There might be other circumstances where planning permission is required so it's always a good idea to check with your local planning department before you start, or check the Planning Portal for guidance.
Knocking out the chimney breast

Not the nicest job
We removed this chimney breast from the room above when we renovated our kitchen-diner so that we could have an open floor plan rather than two separate rooms. It was taking up valuable space here so it was a relatively easy job to knock it out because it didn't need an RSJ.
Relocating the services
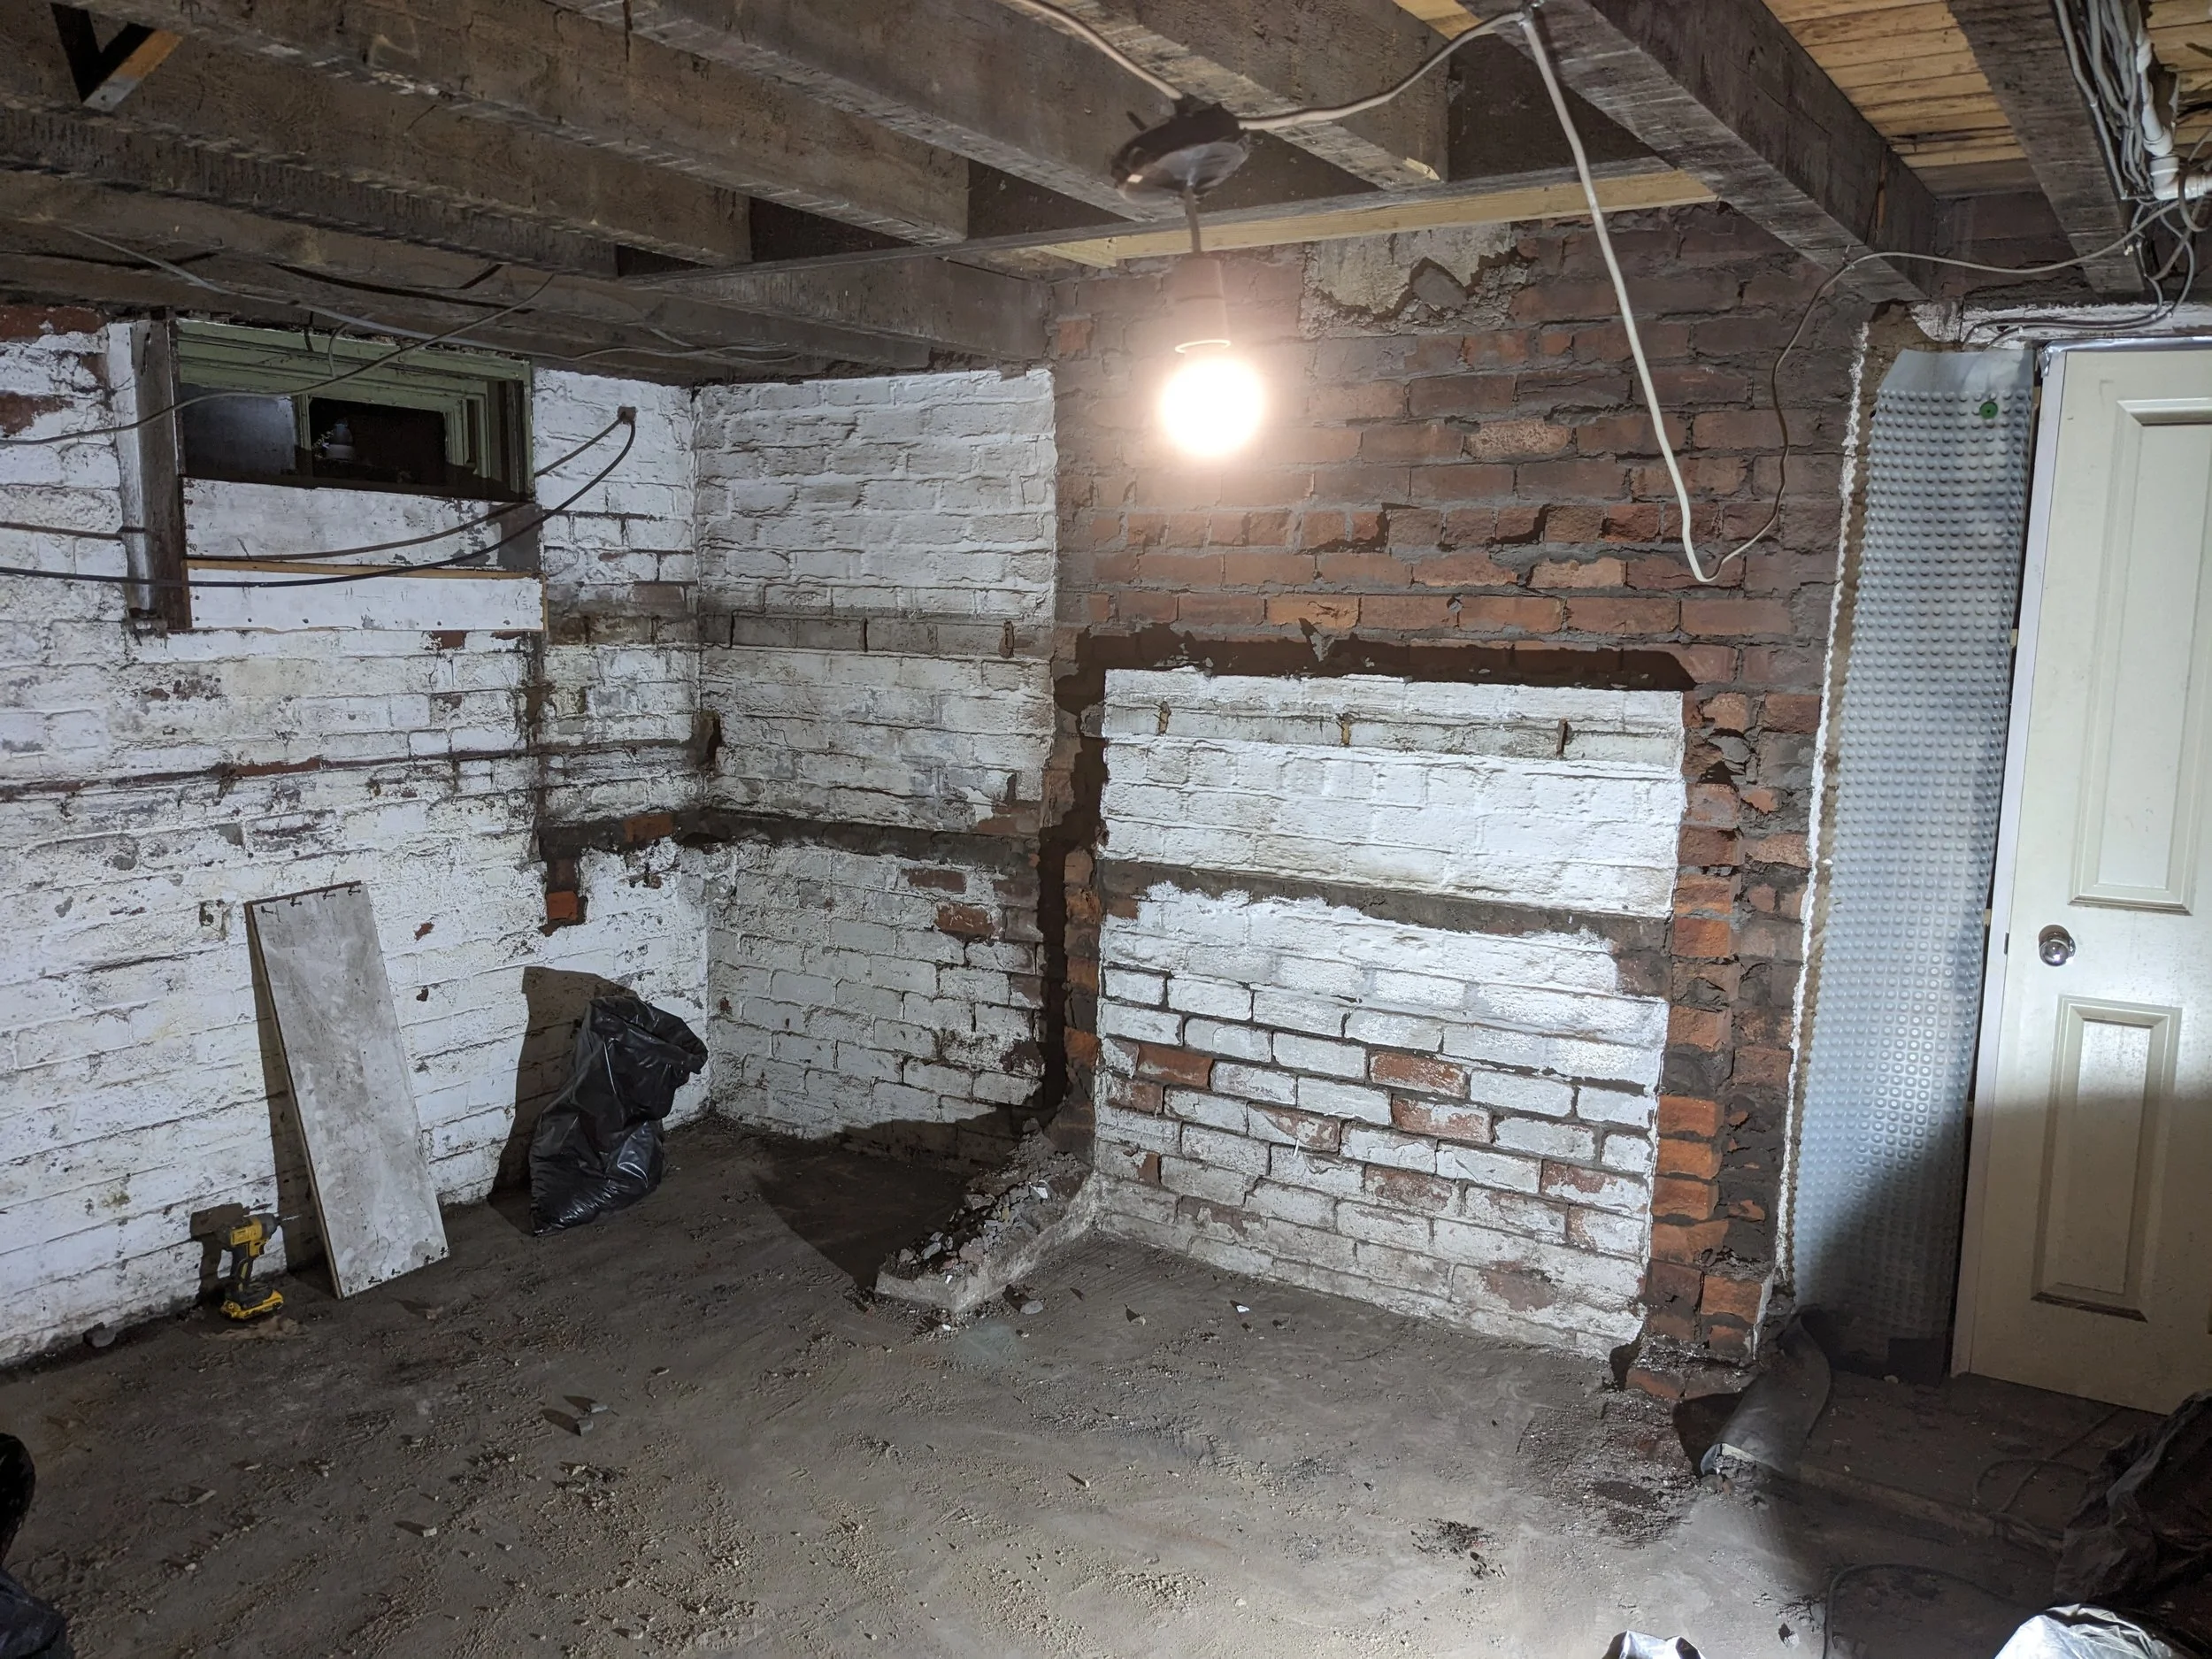
If there are any pipes or cables in the way, they'll need to be relocated. We had water pipes and wires running below ceiling level and around the walls so we moved them up to the ceiling and positioned them between the joists.
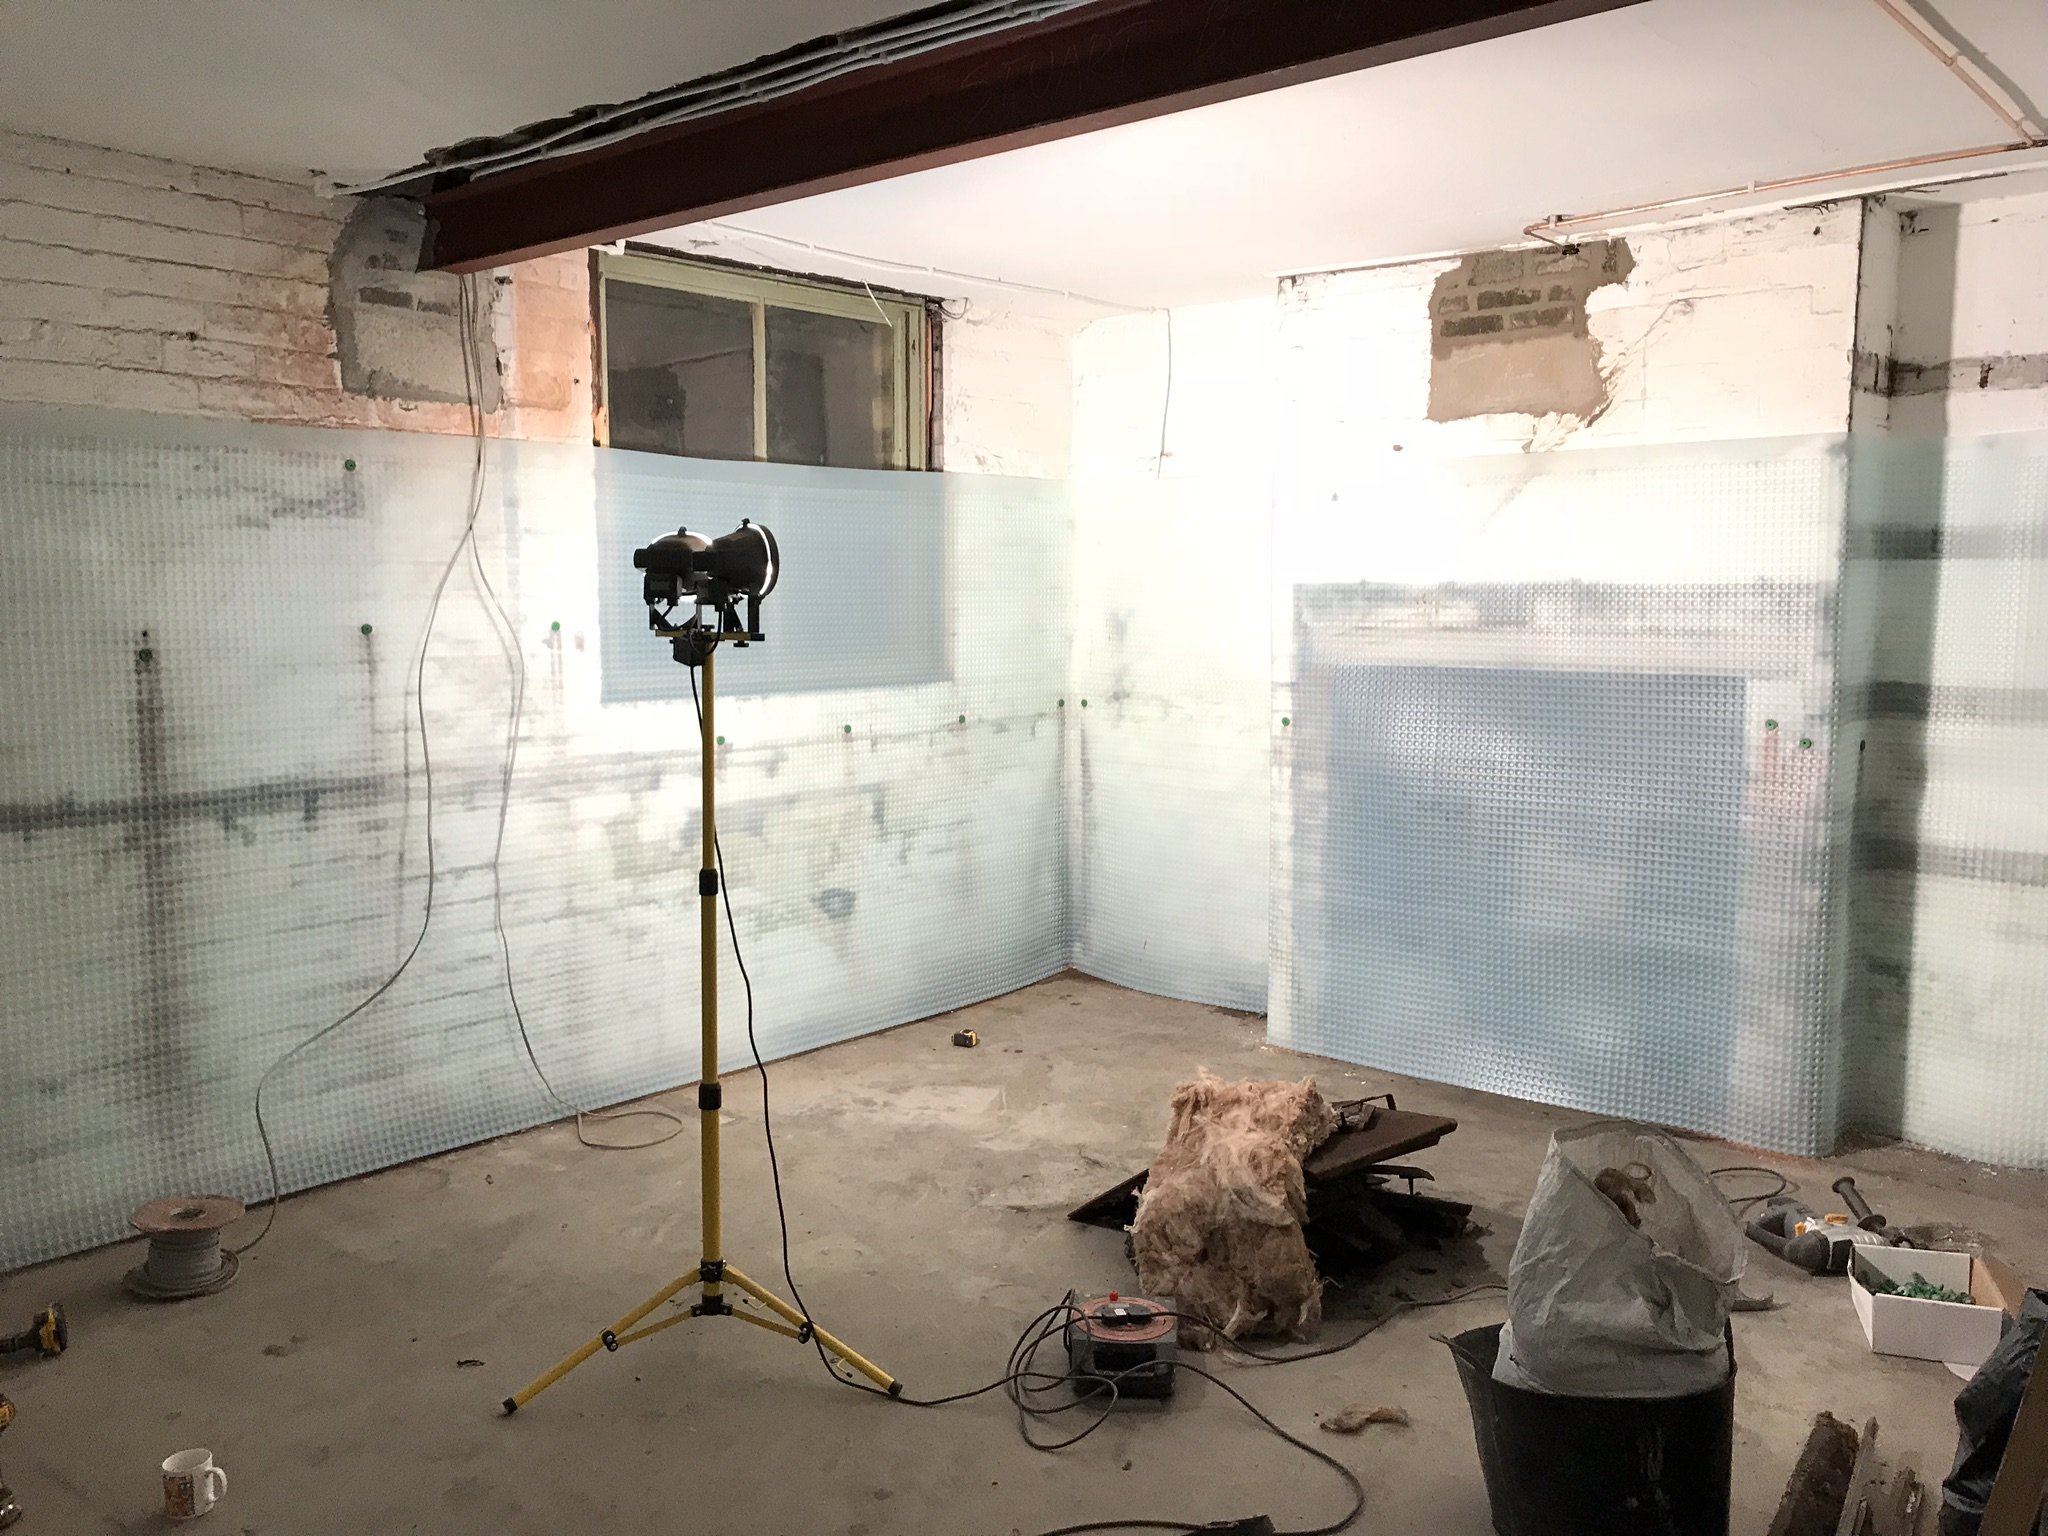
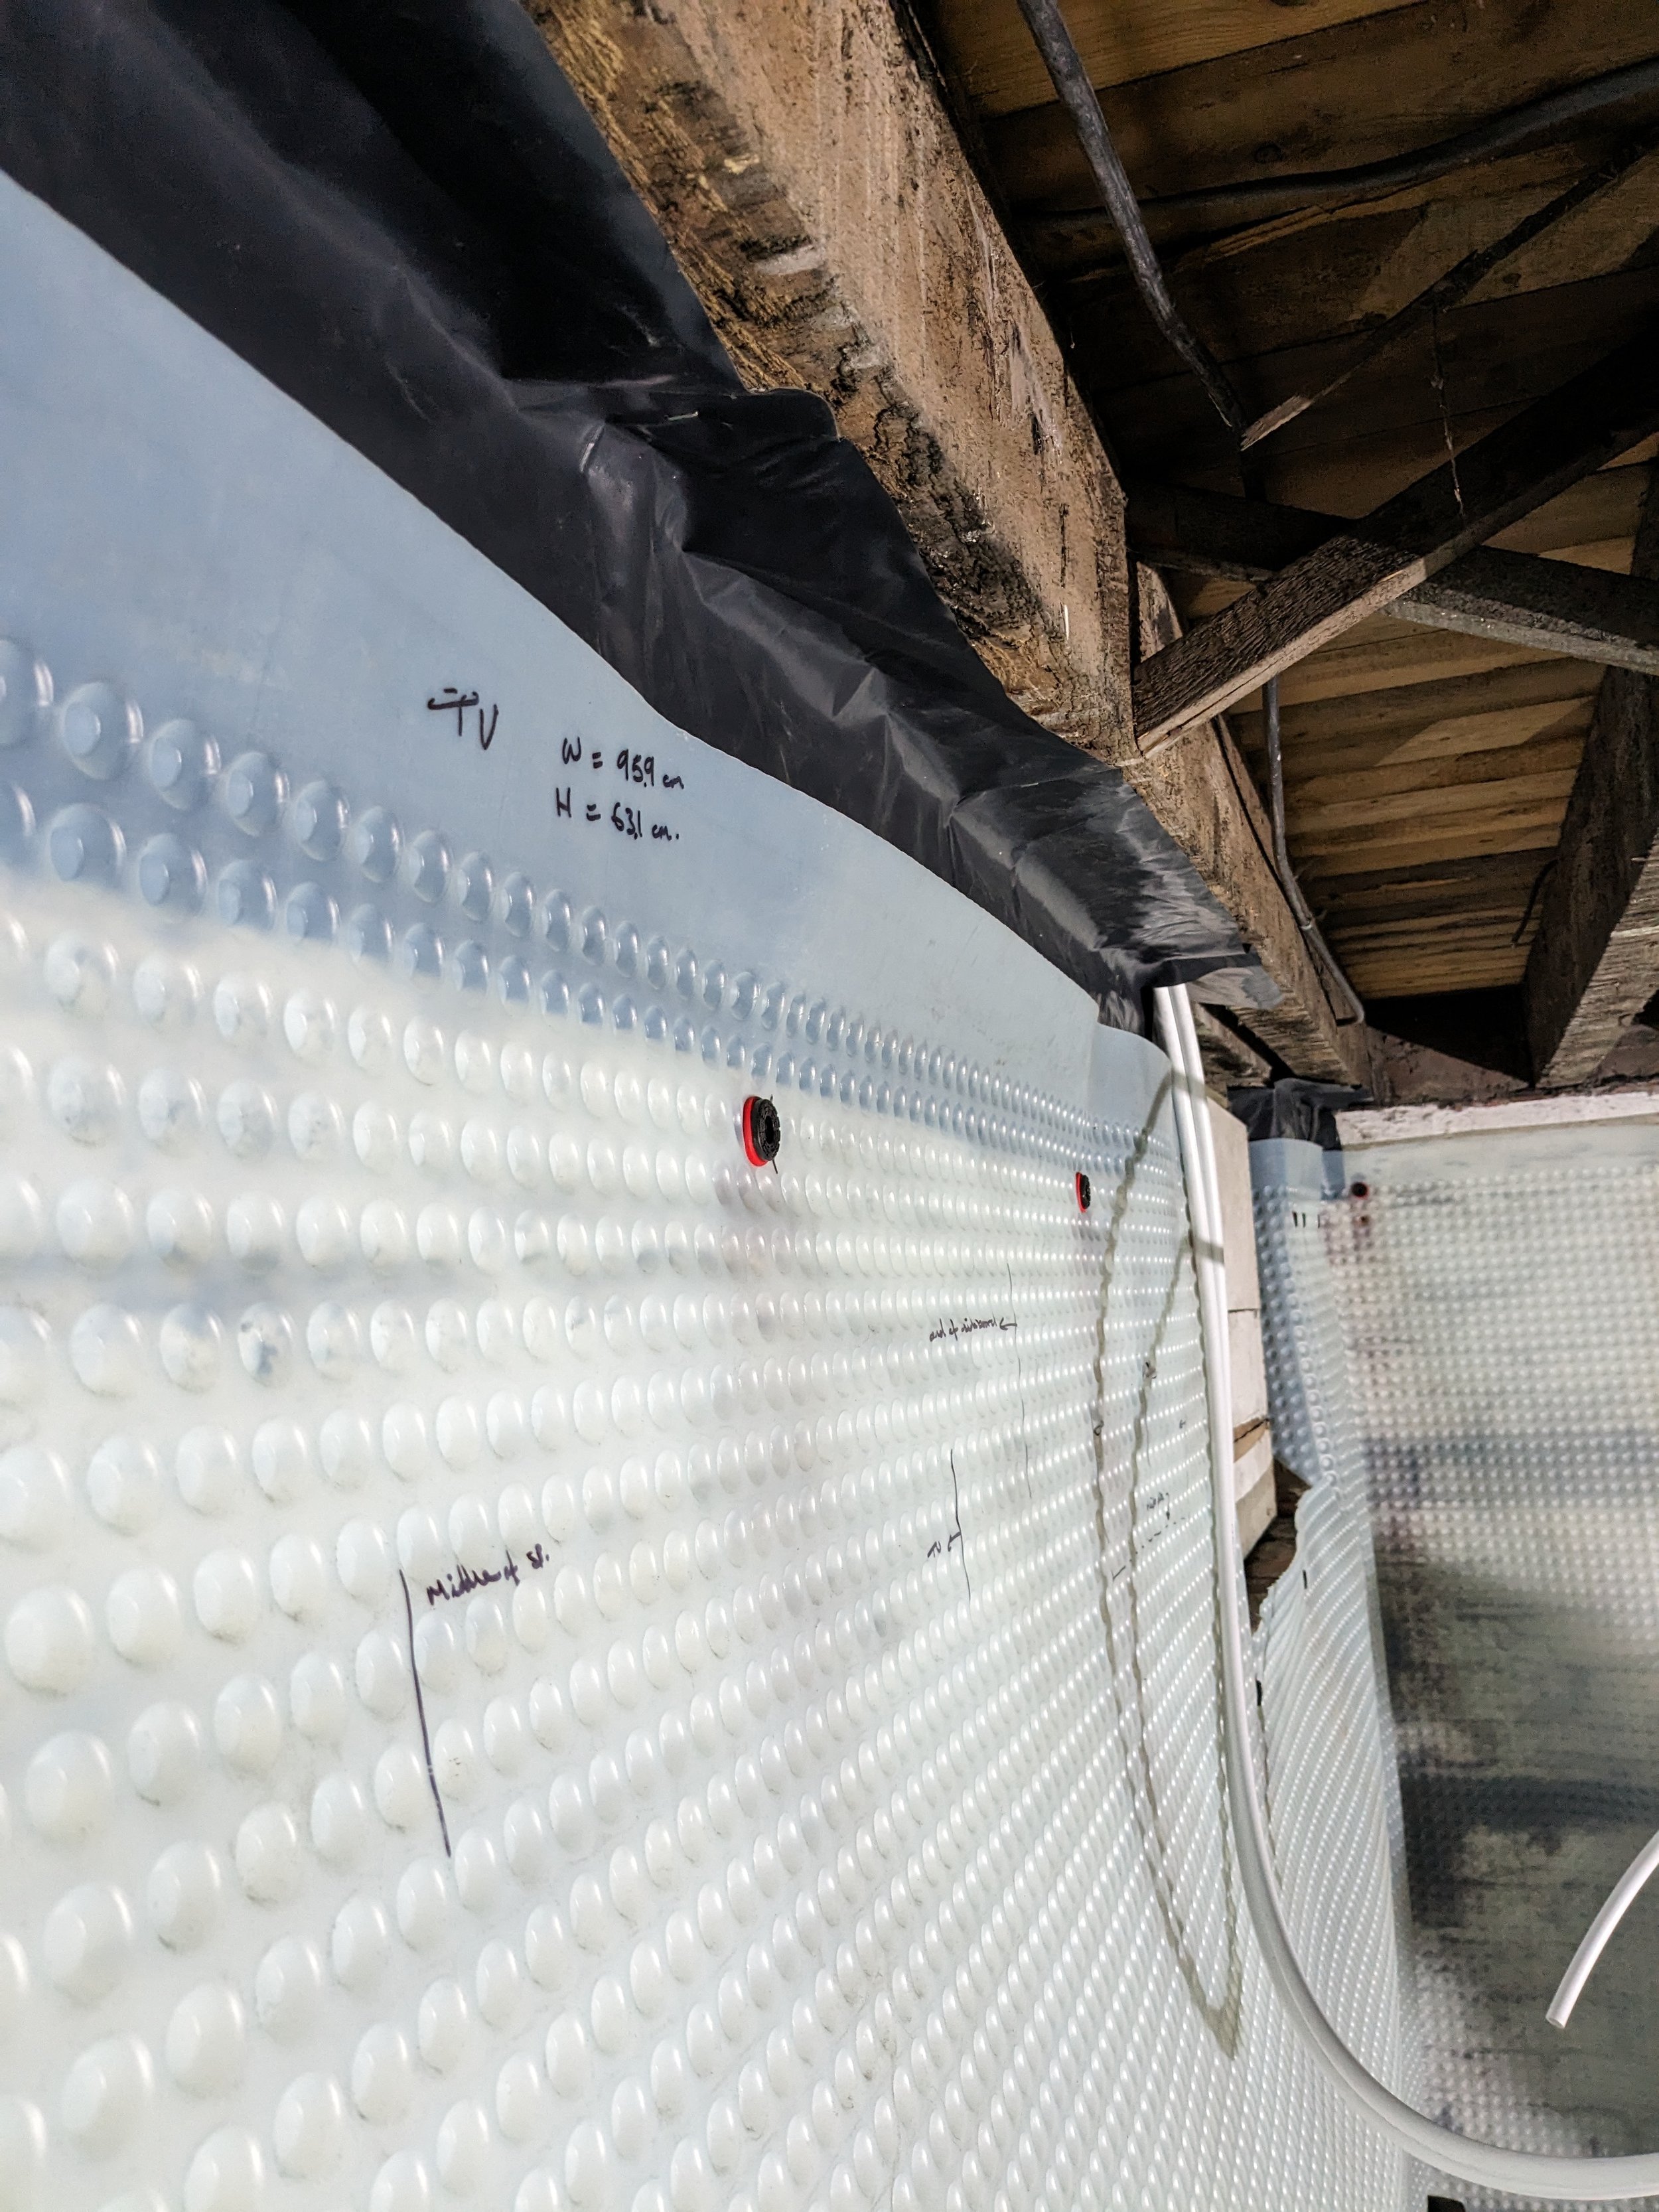
Tanking the Basement Walls
We attached tanking membrane to the walls using membrane fixing plugs.
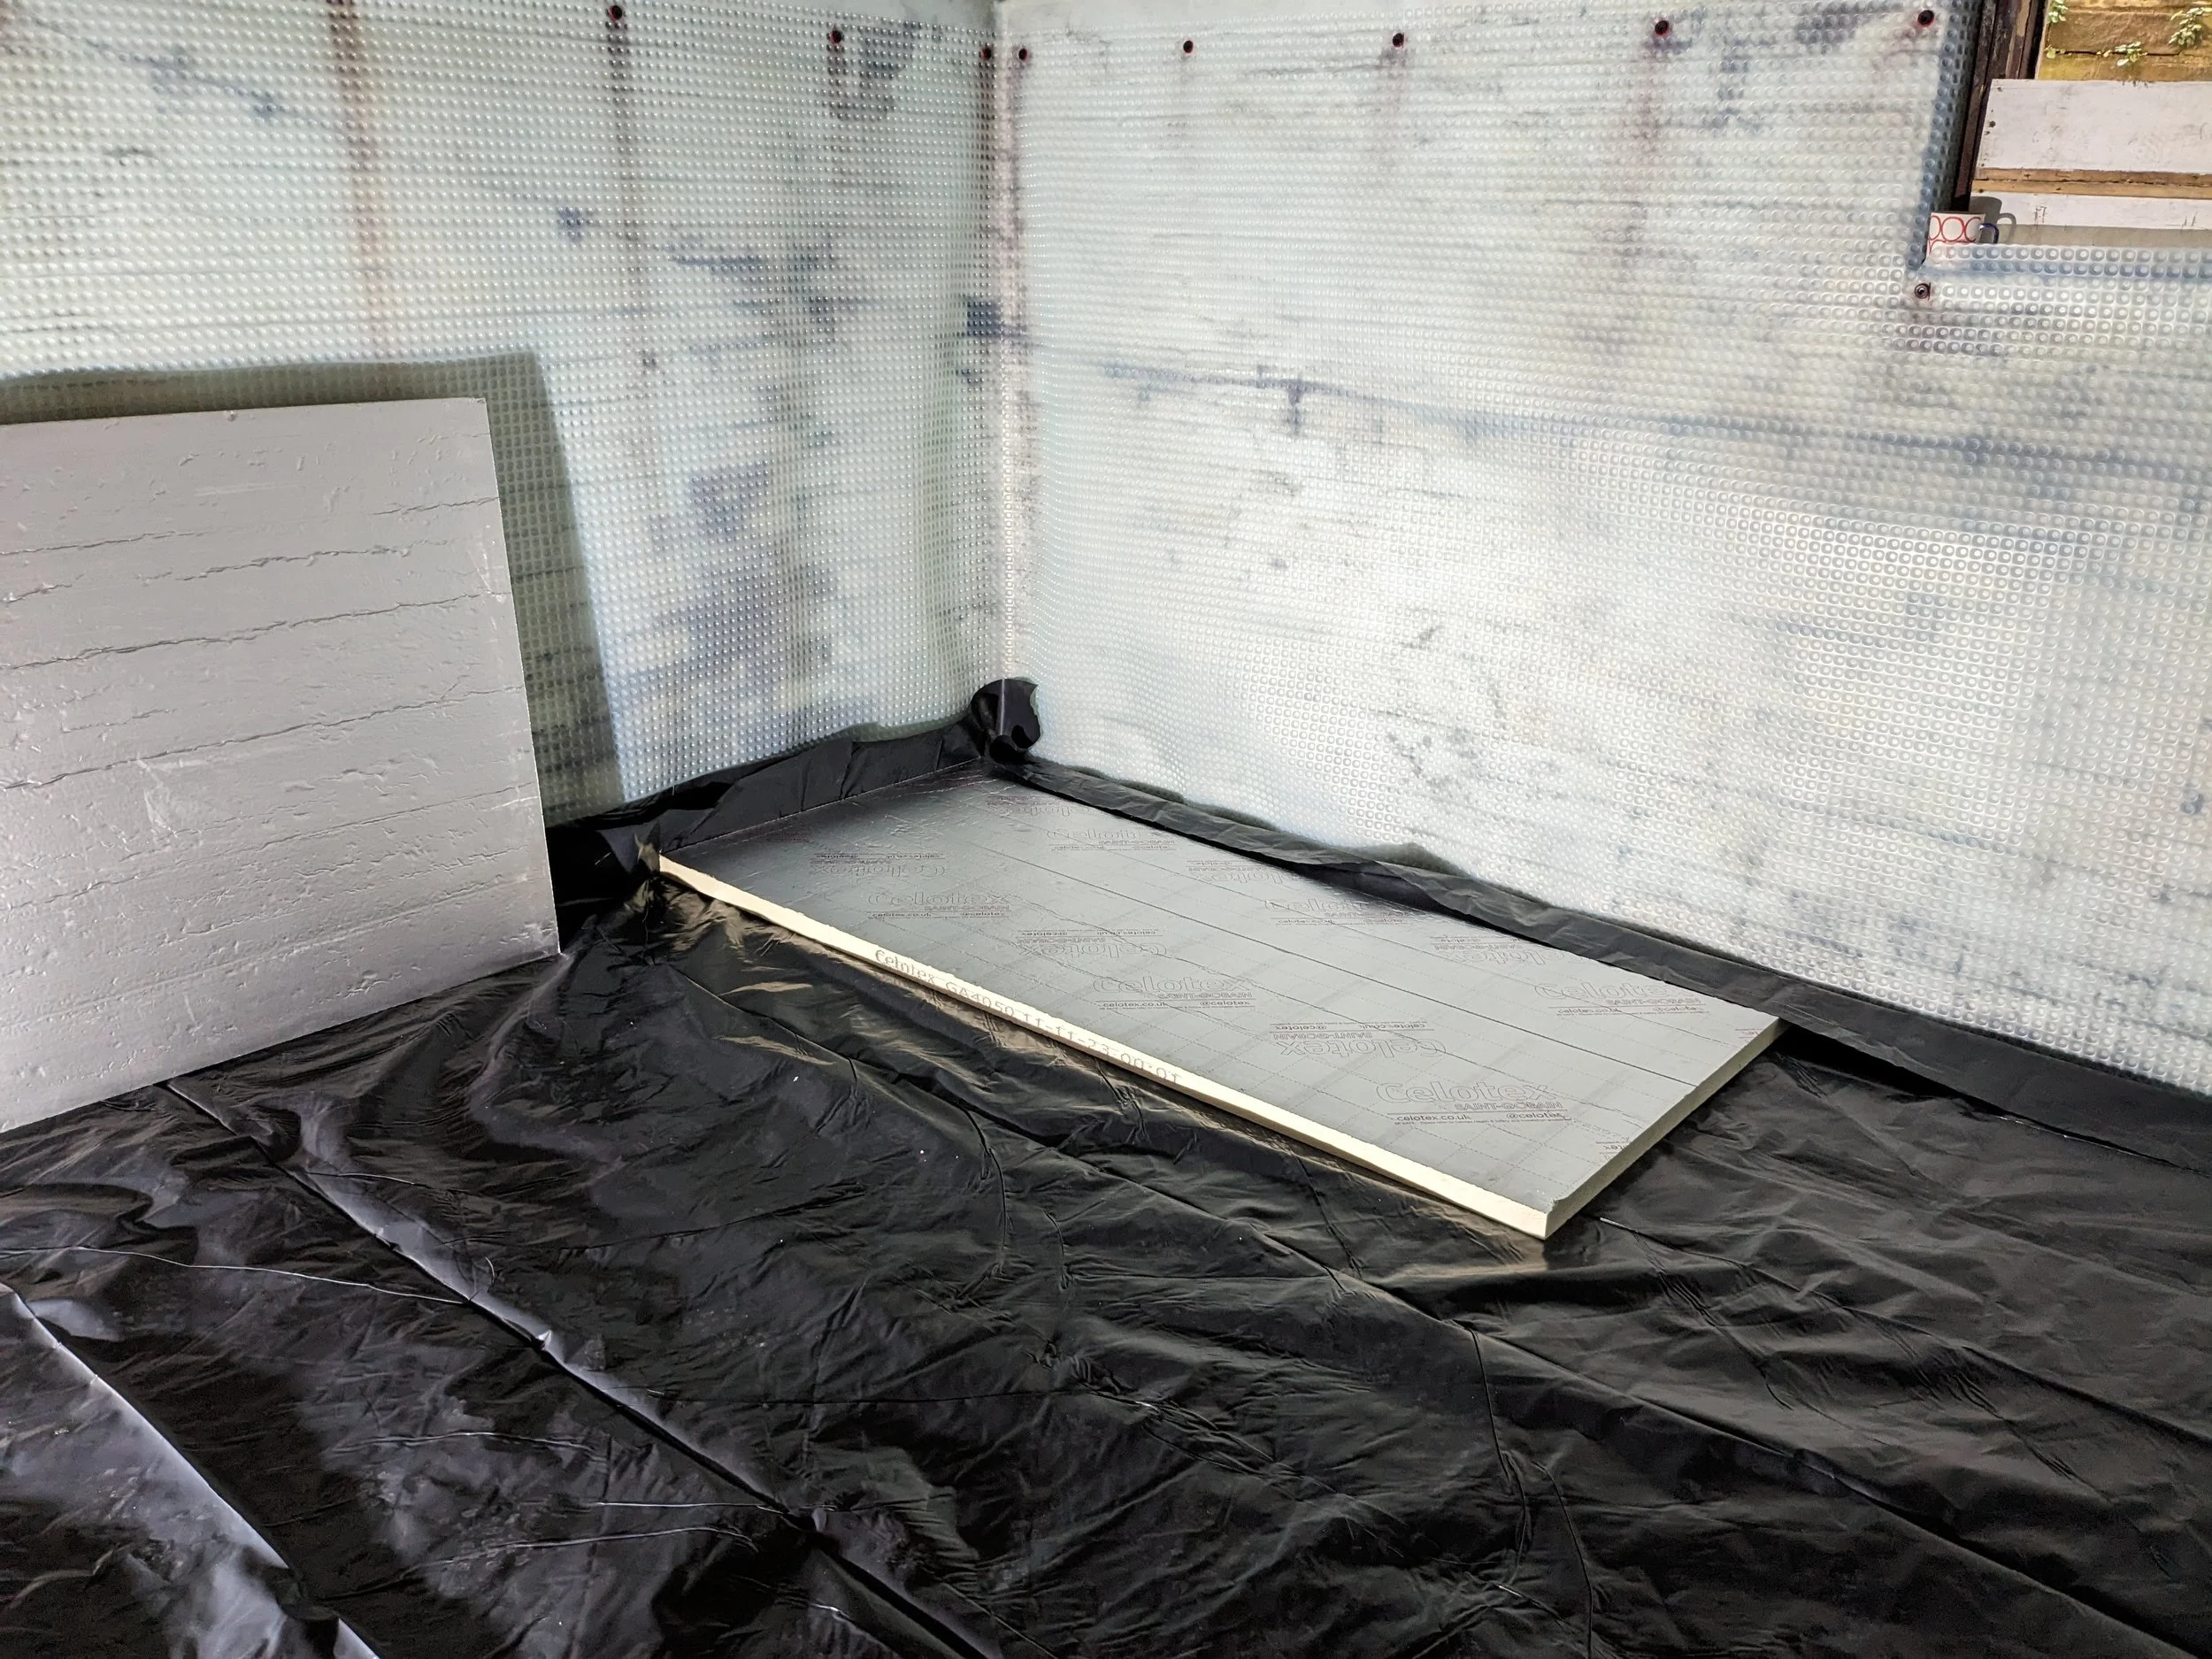
Installing a New Basement Floor
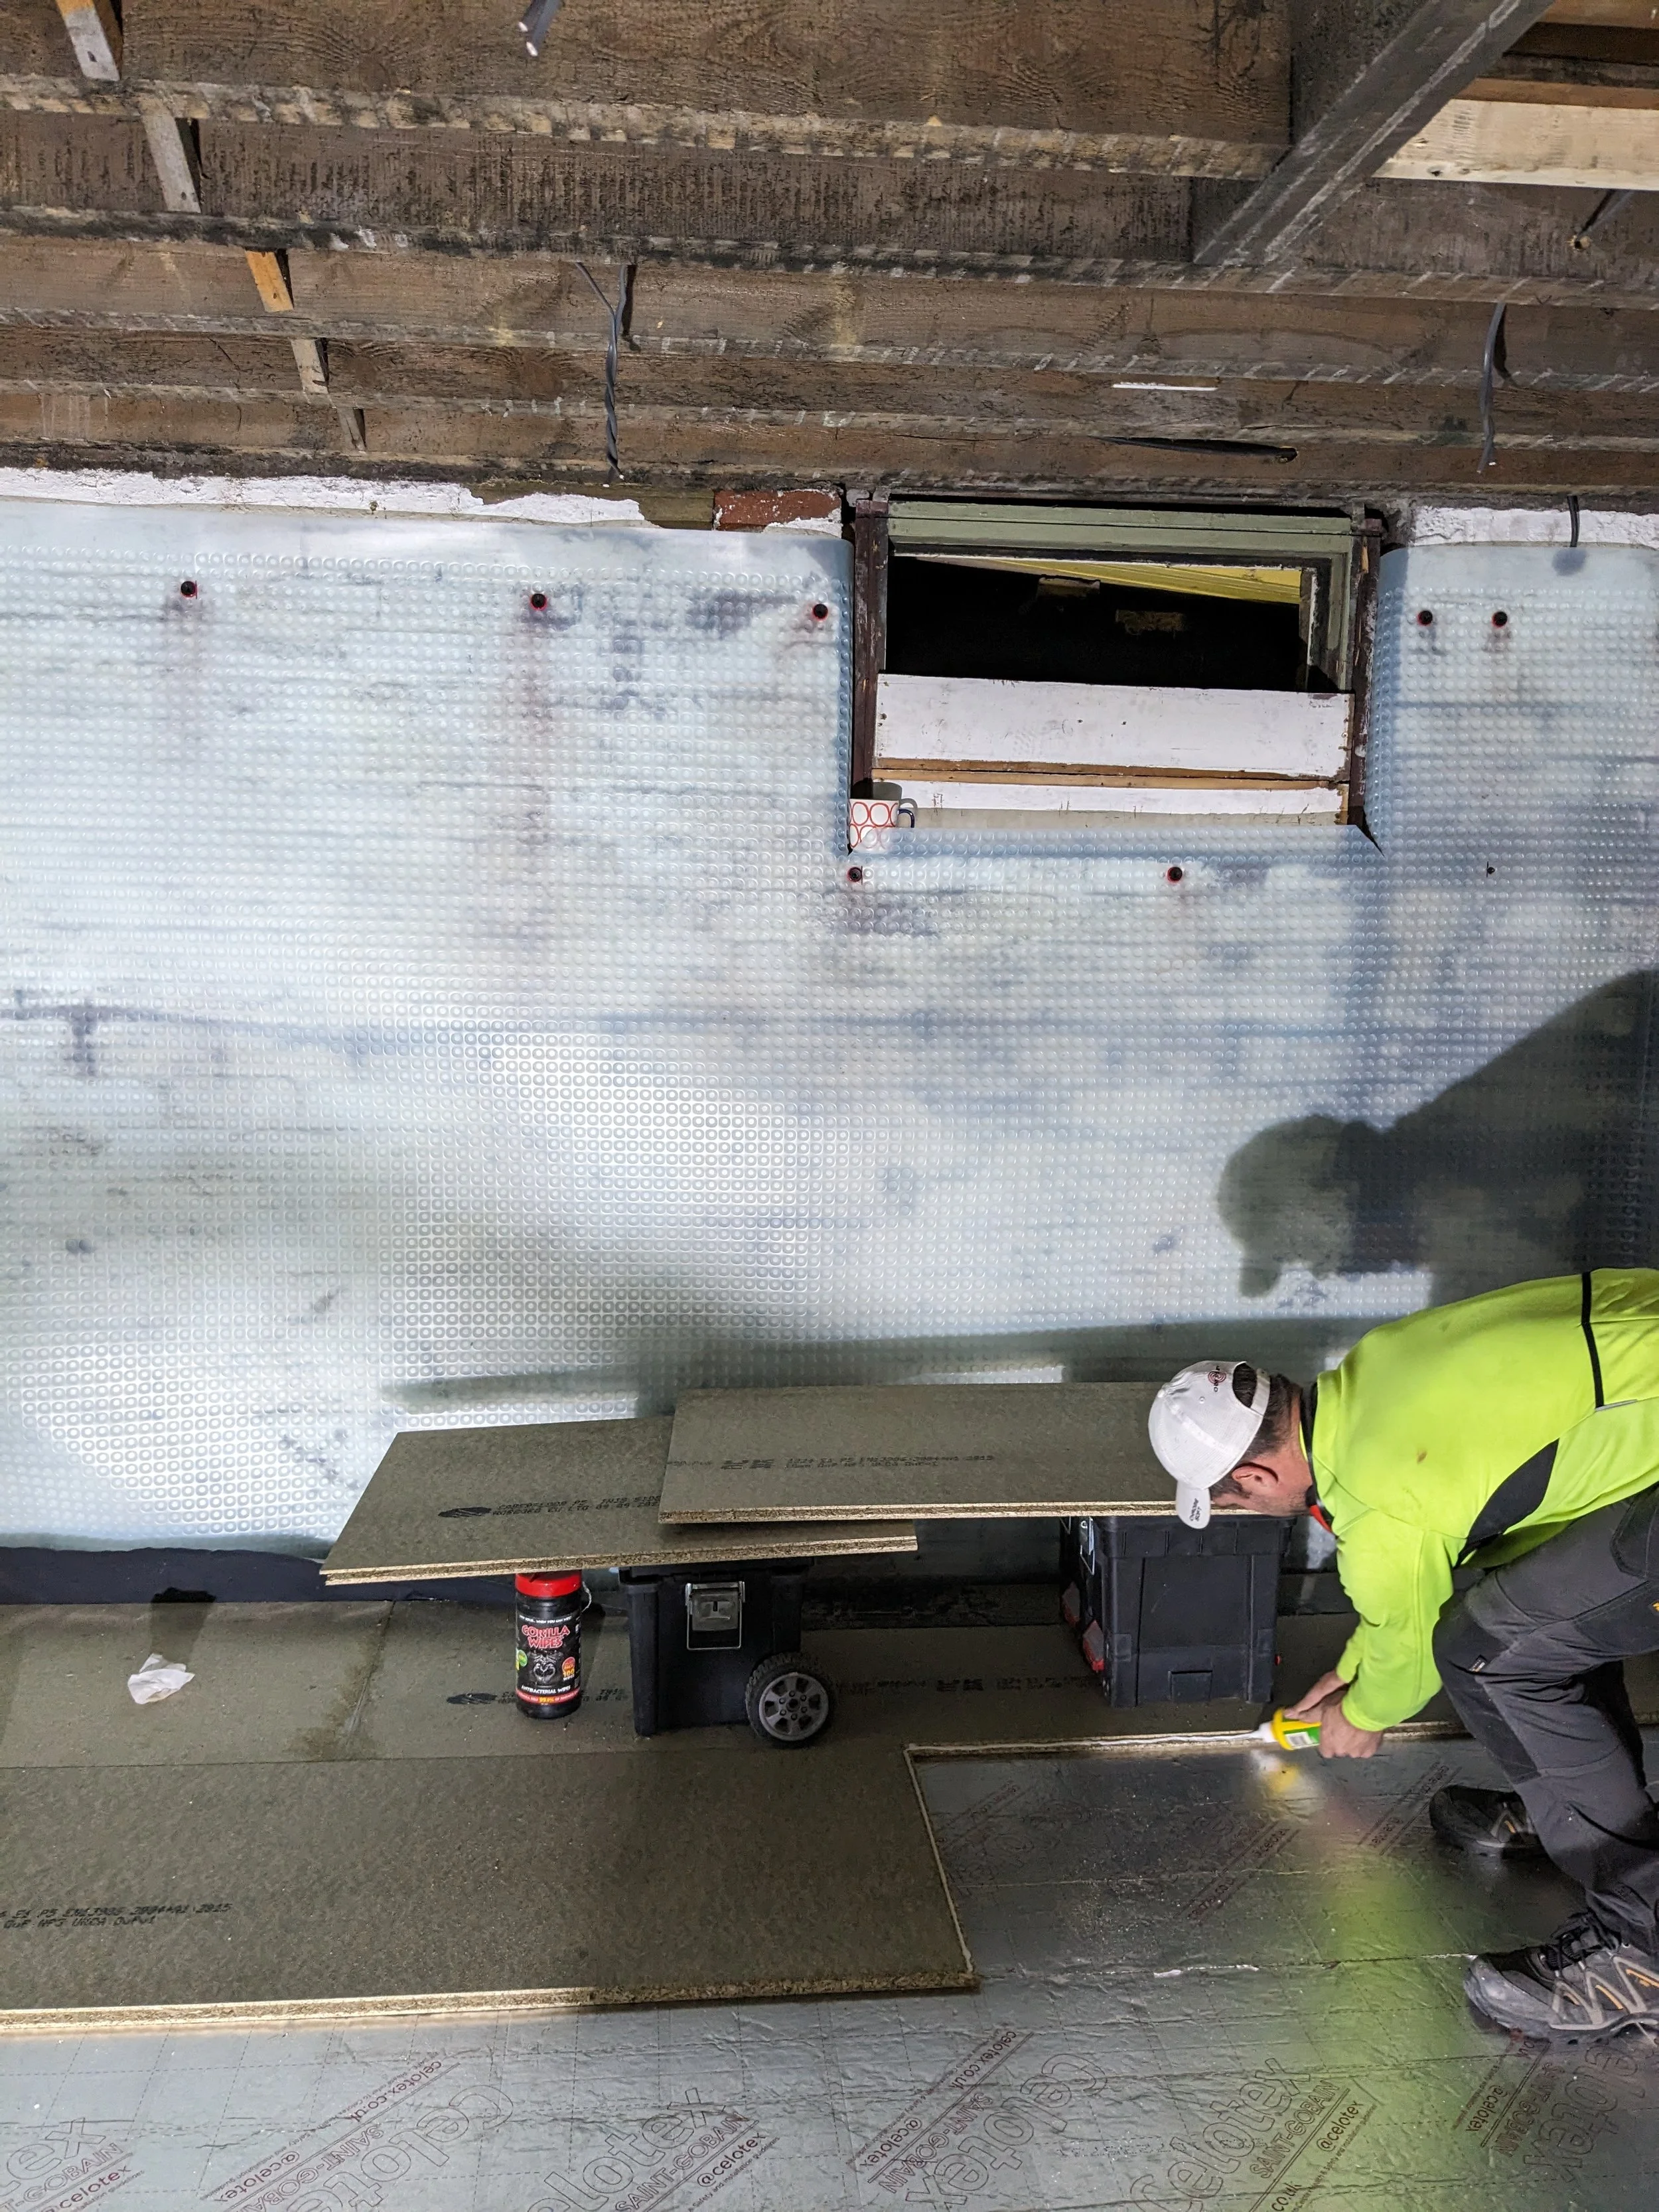
Flagstones would originally have been used on the floor but it's quite usual in an old basement for a concrete floor to have been laid on top at some point, as was the case here. The first step is to lay a damp proof membrane which needs to rise up the walls slightly to prevent any moisture issues. We taped the joints with jointing tape and then taped together the floor and wall damp proof membranes so that they were sealed. We put insulated boards on top and added a chipboard subfloor. If your basement is really wet, you might also need to have a pump installed - best to consult an expert on this.
First fix electrics and plumbing
Once the floor is down, it's time for first fix - this is where the pipes and cables are laid in the walls/ceiling for the new electrics and central heating. There are some circumstances where you'll need to get an electrician to do the work and certify it, such as if a new circuit needs adding. If you feel confident enough doing the electrical work yourself, it's best to check this with your building control officer before you start.
Installing a New Basement Ceiling
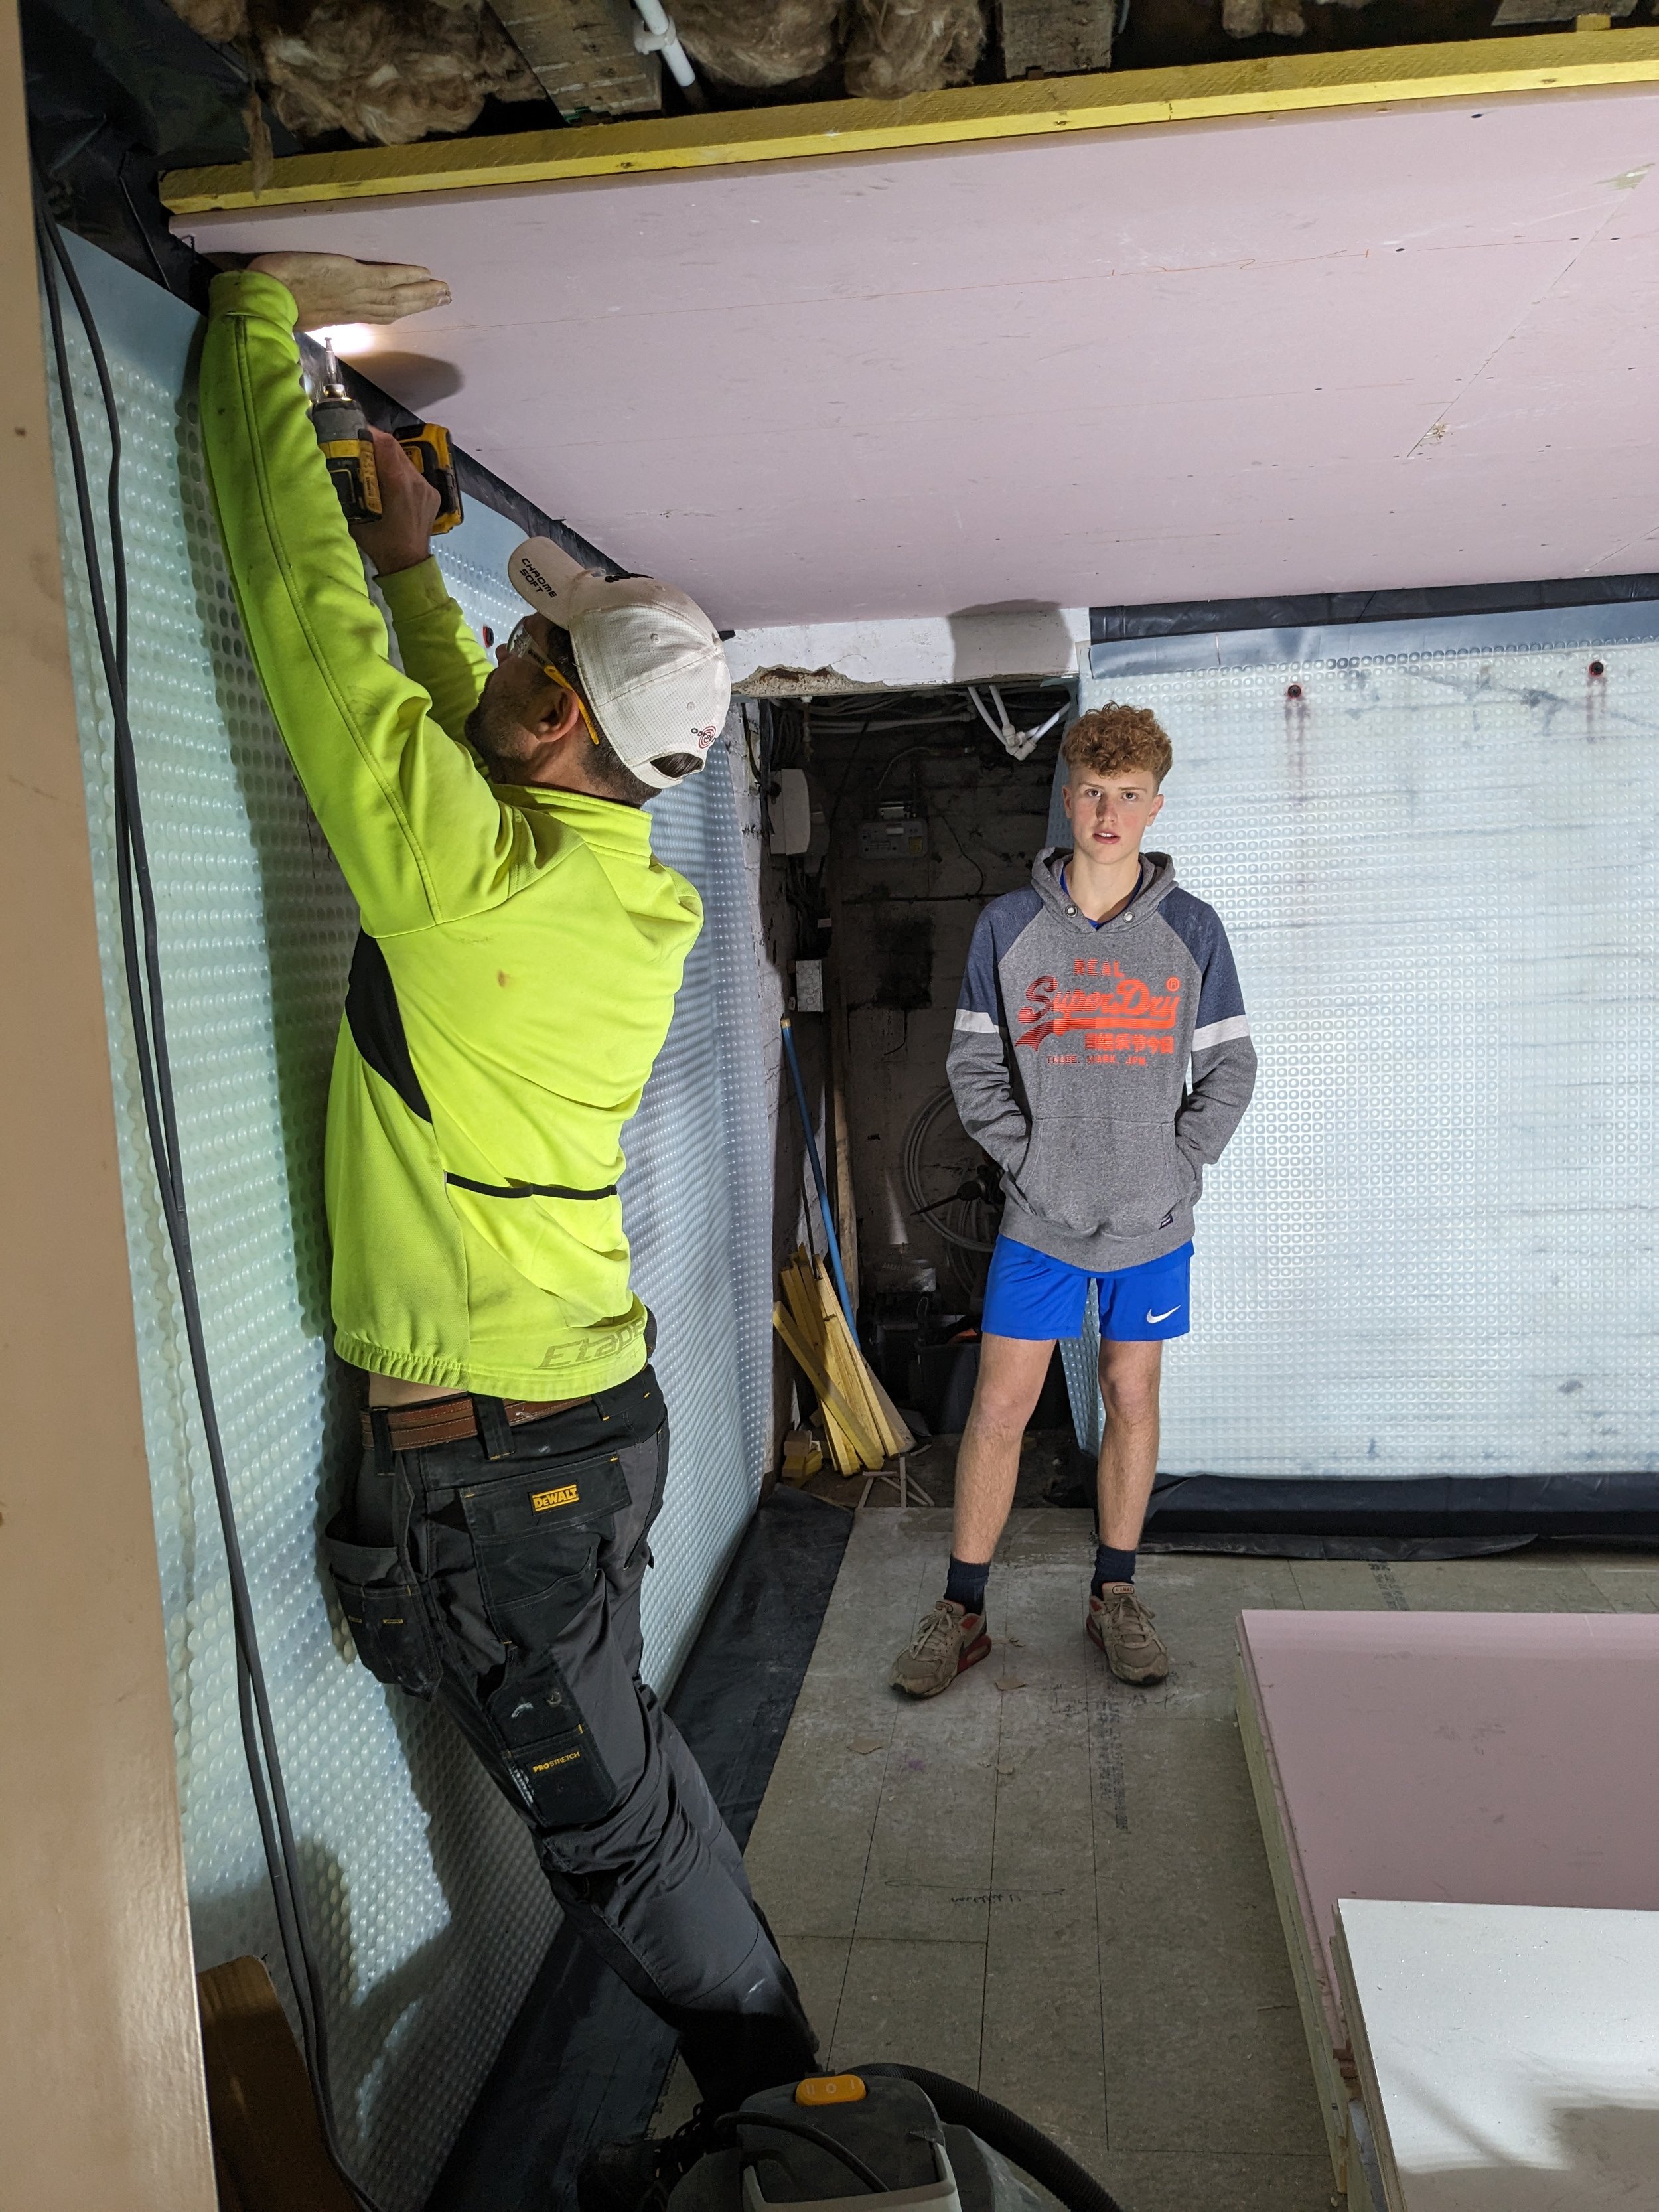
That’s Jack - our eldest boy and he was Oliver’s labourer on this job. Very helpful lad.
If the joists aren't level, which is quite usual in a period house, you'll need to run battens along it and level it off using a laser level. Oliver had loads of fun with this - it added a day on to the job. Lots of swearing that day. When he'd calmed down, he boarded the ceiling with fire resistant plaster boards.
Replacing the window
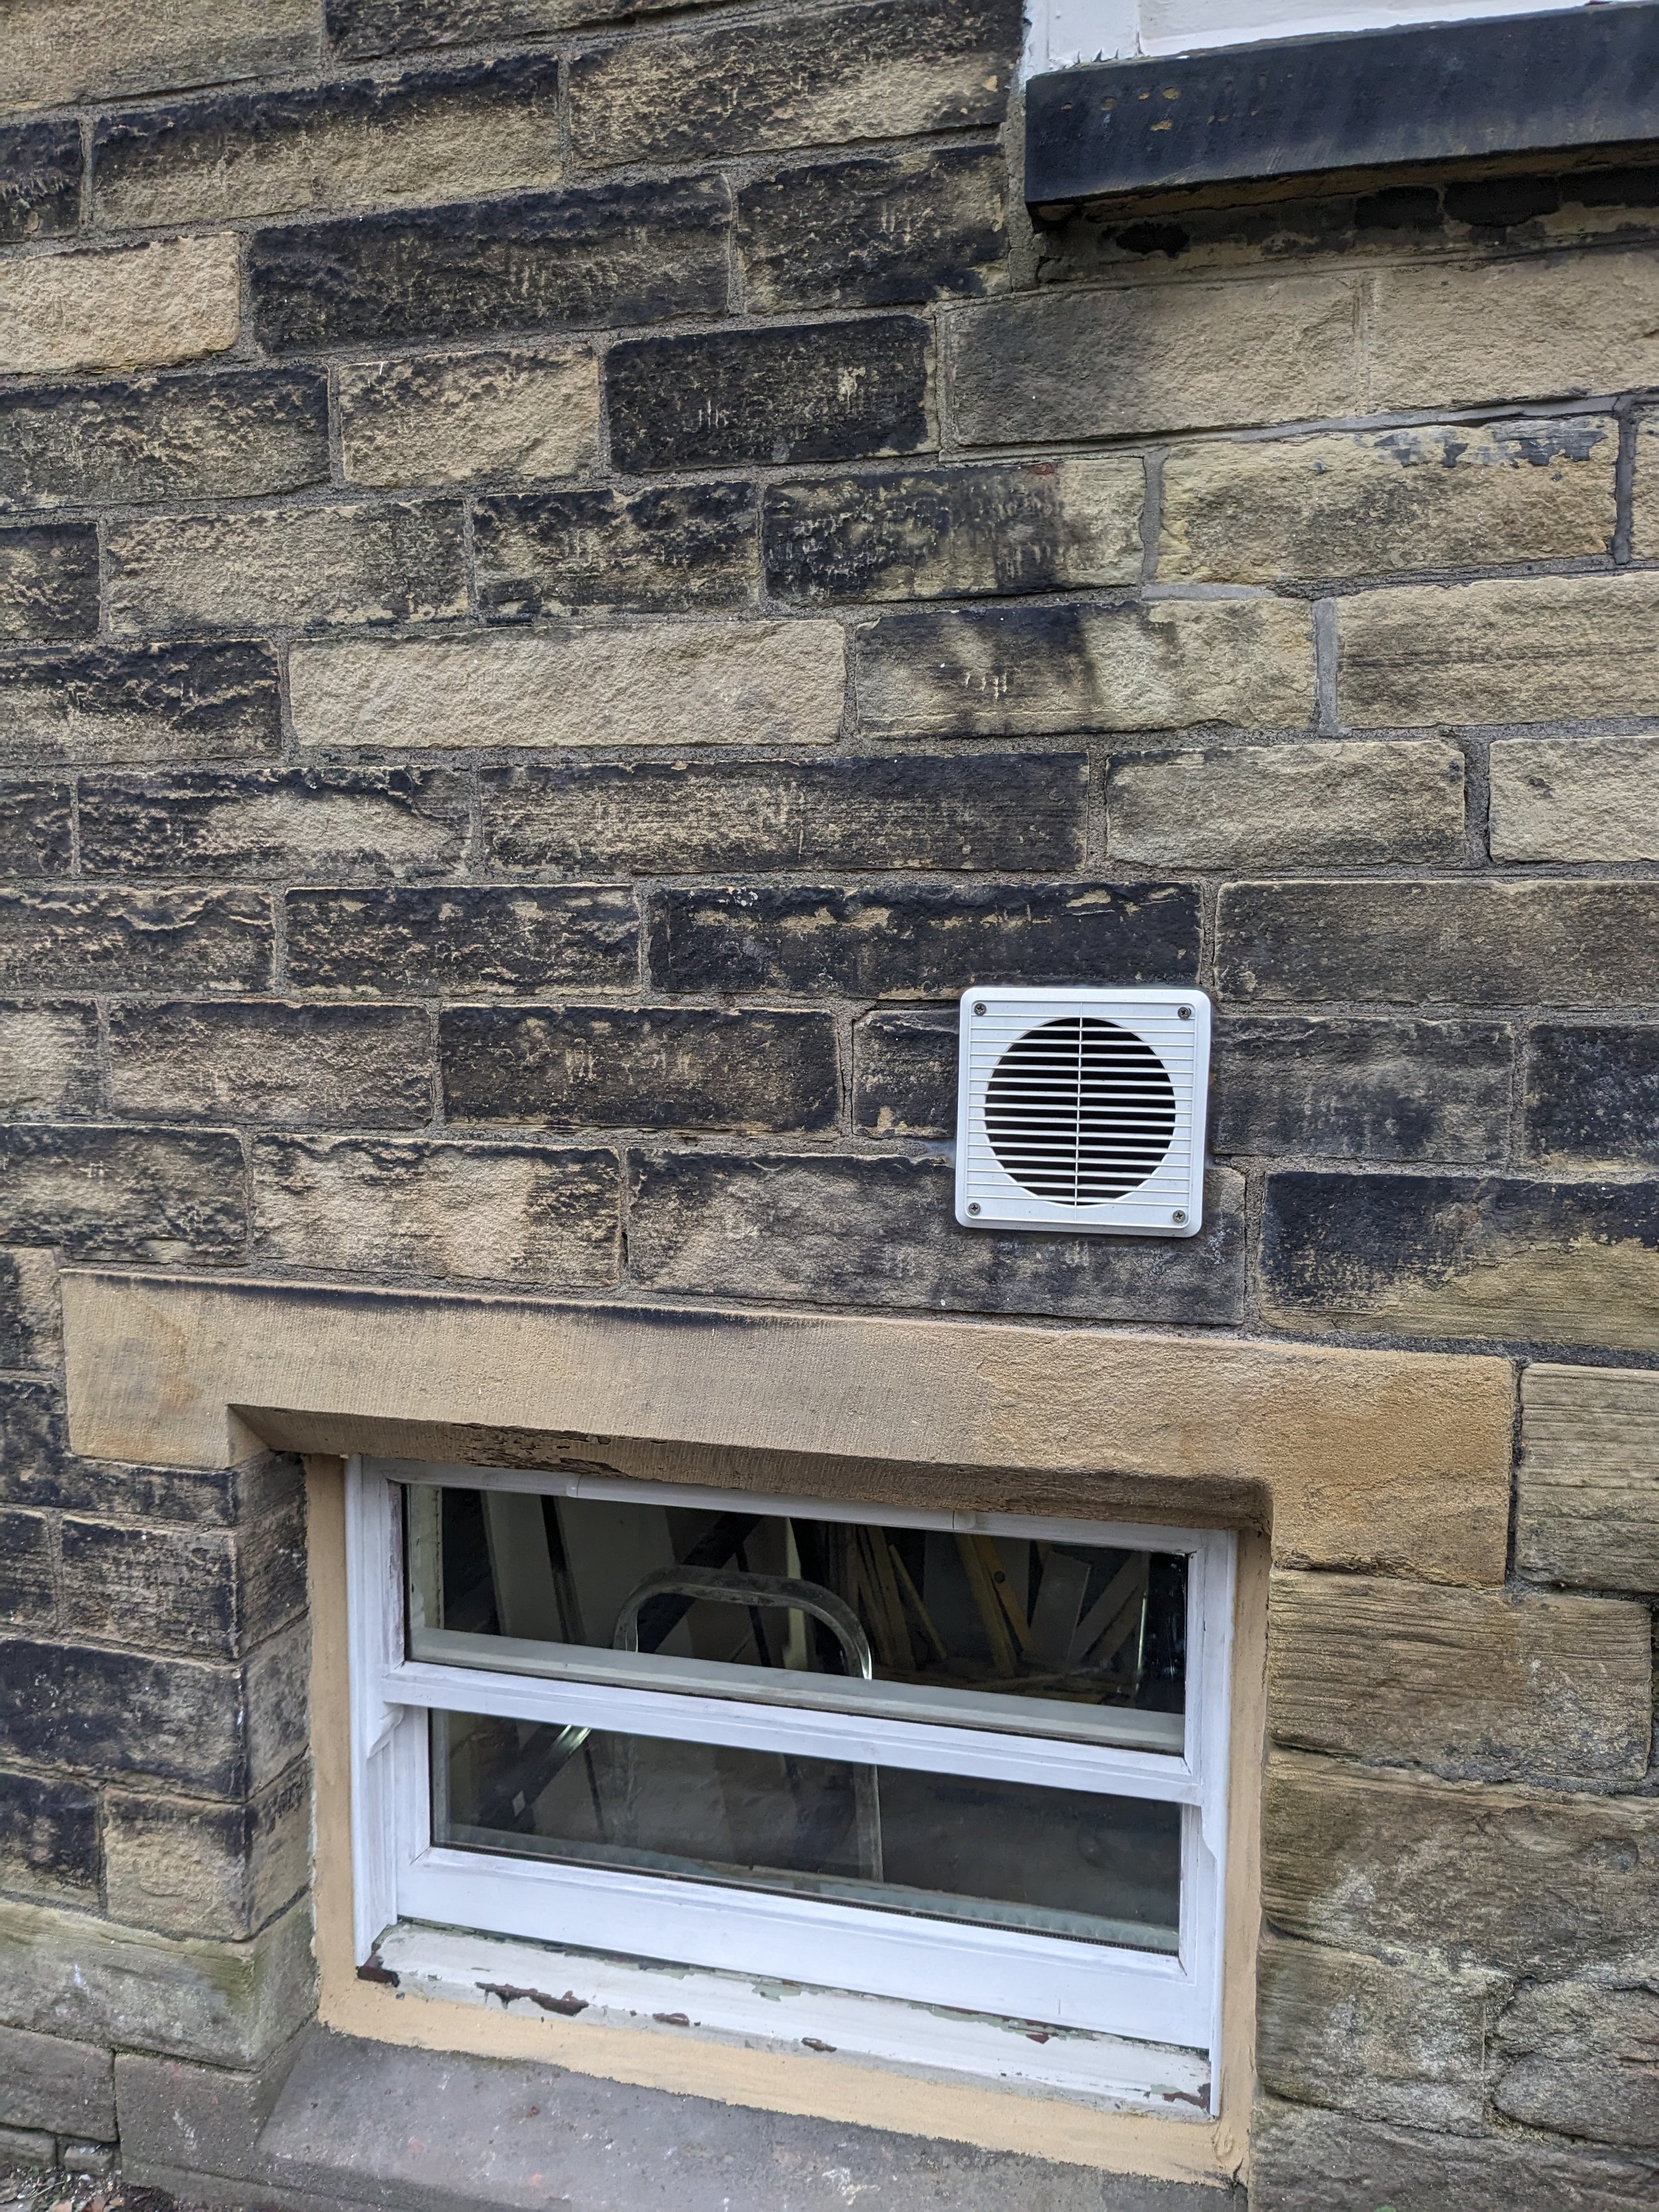
The new sash window from outside
This room doesn't get a lot of natural light because the window is really small and it's also very close to ground level. It's a lovely original sash window though so we had it restored. It cost £600 including removal and fitting. We could have saved on costs by going for a cheaper option like PVC but windows are one of the most important things when restoring a period house so we were willing to pay the additional cost. If you're replacing a window, you need to make sure that the new one is fitted before the room is skimmed.
Plaster boarding Basement Walls

There were two options when it came to plaster boarding the walls - either 'dot and dab', where boards are attached using small dabs of plasterboard adhesive, or by attaching battens to the walls. There are pros and cons to each but Oliver used the batten method and then wished he'd dot and dabbed. Once they were attached, he added insulation boards on the external wall and also put insulation between the battens on the internal walls. Then he attached the plasterboards and we got a plasterer in to do the skimming.
The hidden door

There’s a small storage room (Room 5 on the floor plan) that houses our gas and electric meters and is accessed via this room. After discussing many options, we decided to create a hidden door that would blend seamlessly with the wall.
Interior Design Scheme

Design visual
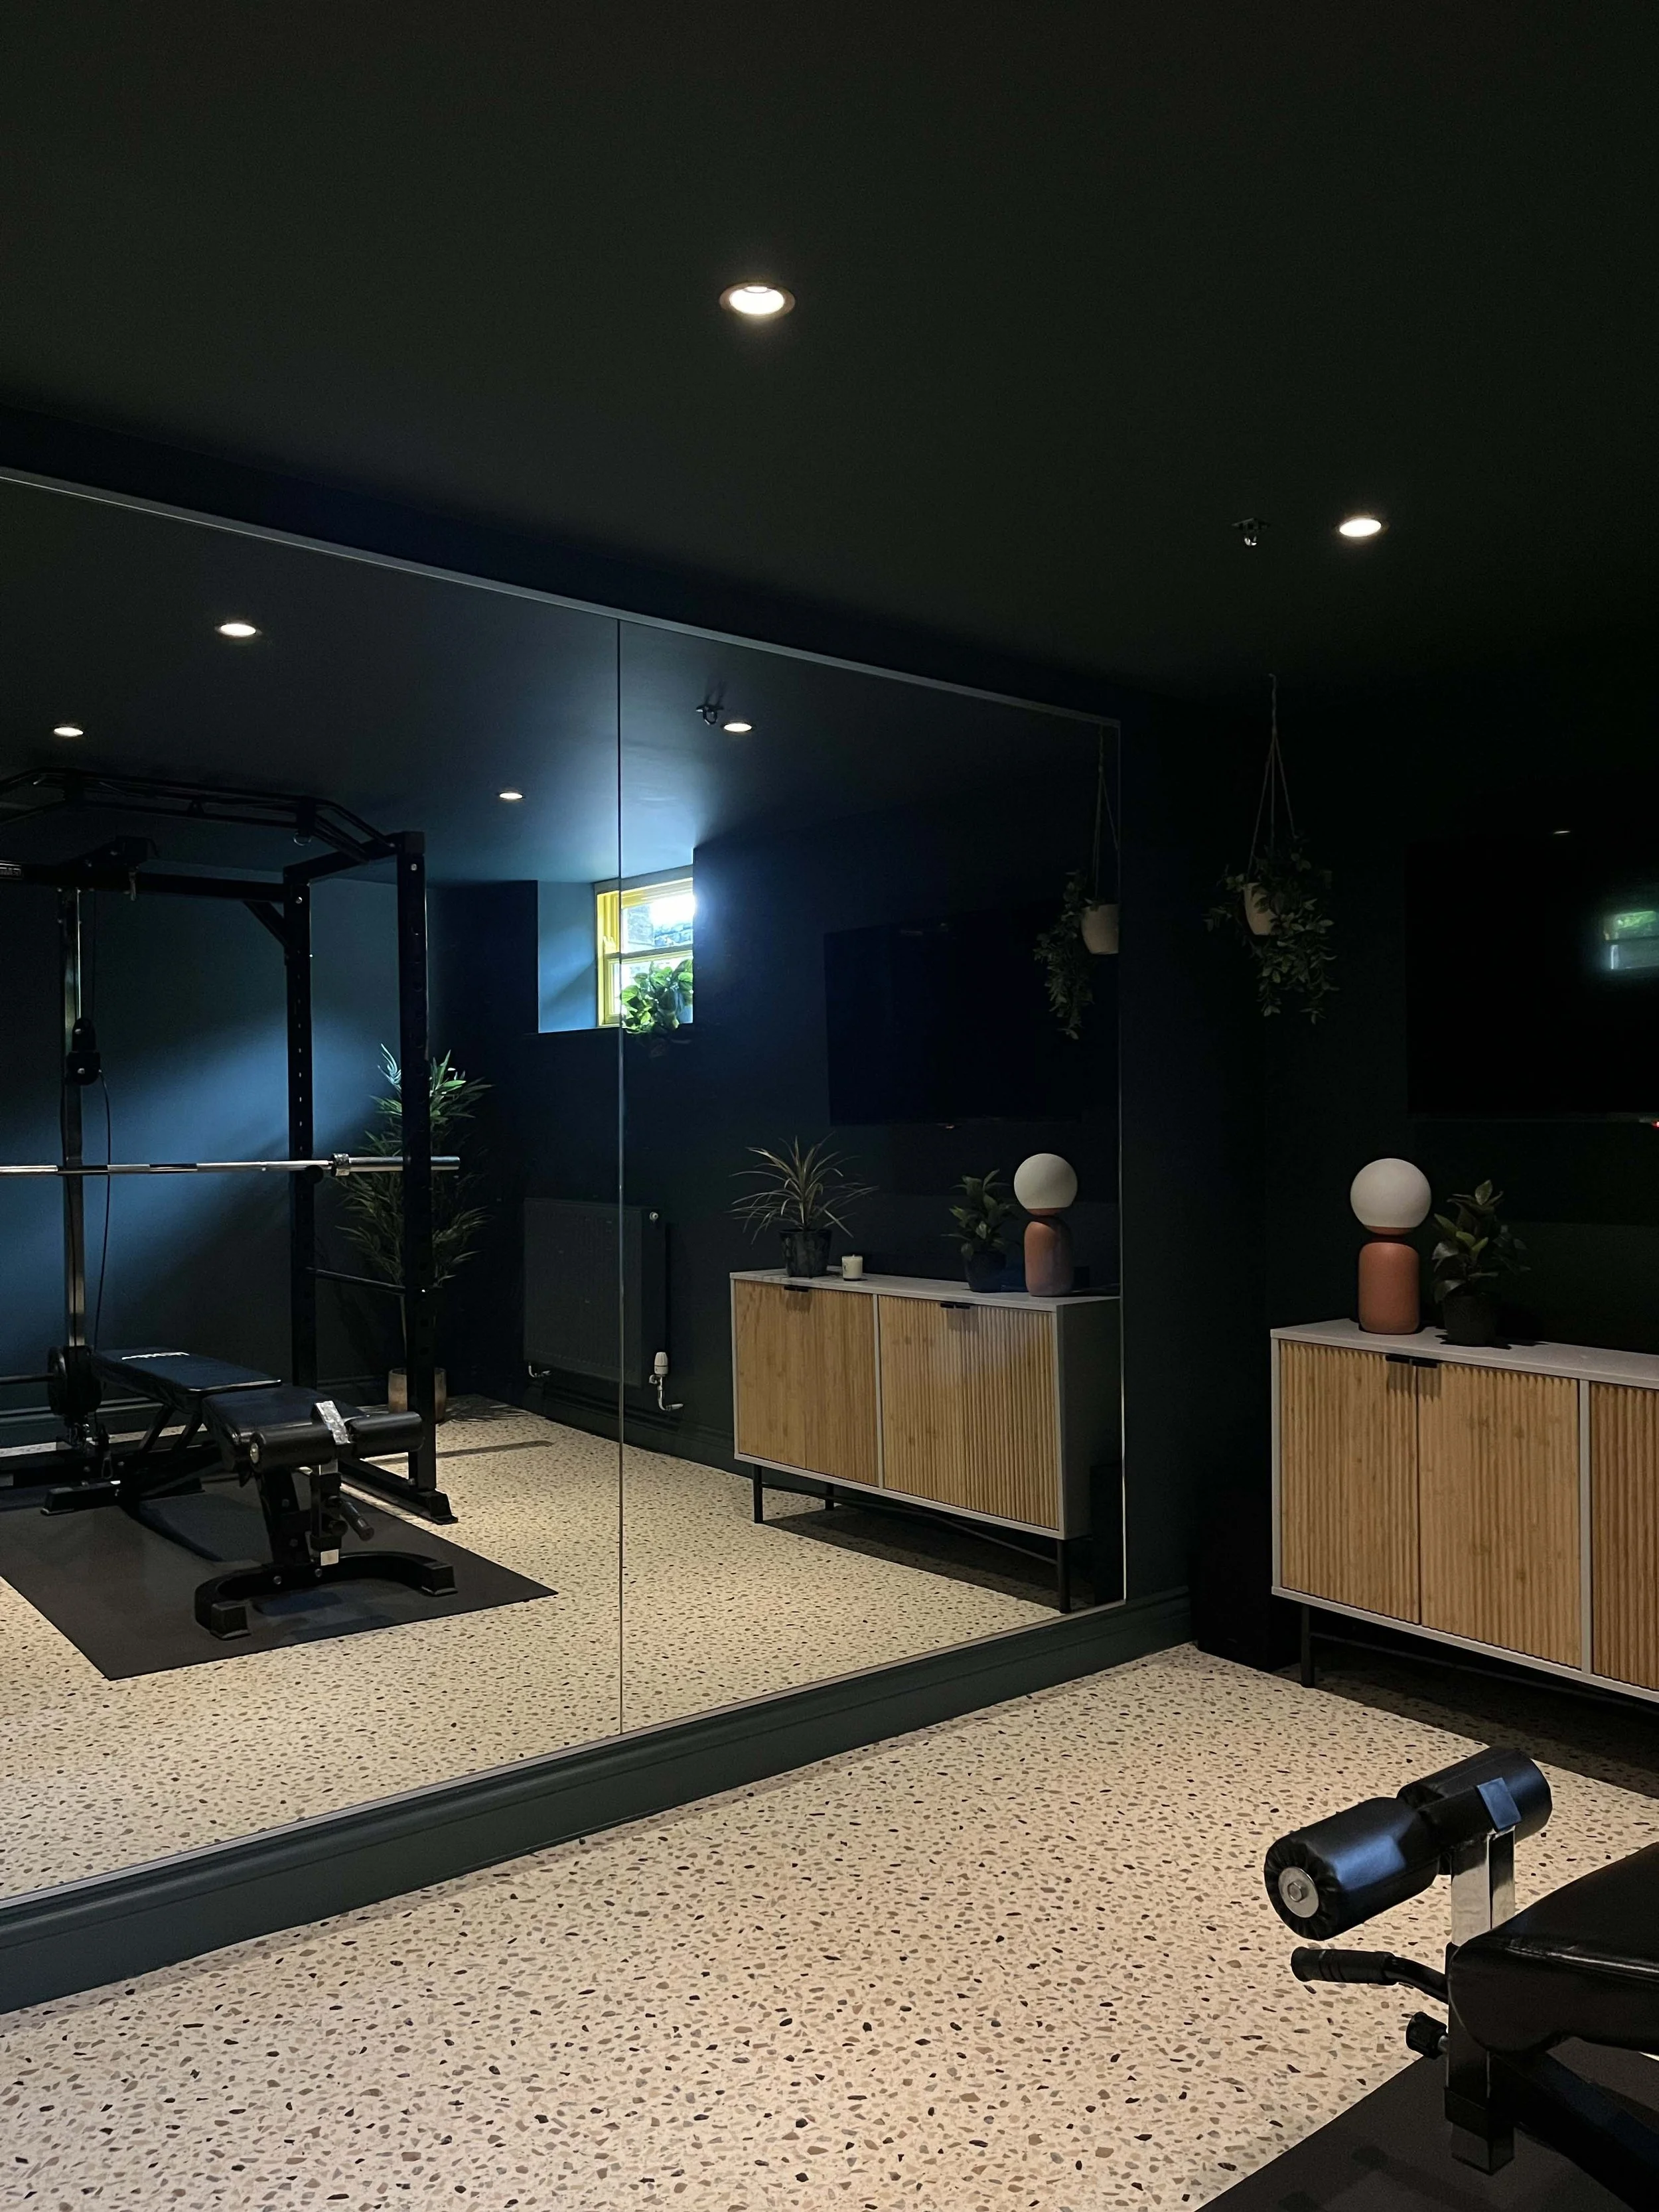
A lot of thought went into the interior design of this room to make the space feel inviting while also making it work on a practical level. White walls in a room that lacks natural light can feel flat and giving a room a fresh coat of paint is the most affordable thing you can do for the most significant impact so on our tight budget, painting the new walls in a bold colour was a great solution. You can read about our home gym design details, including flooring choices, lighting decisions and storage solutions in my blog post here.

The finished room
The costs
The most significant expenses were the skimming and window costs because we brought tradesmen in to do them but we saved a lot of money by doing the rest of the work ourselves. Here's a breakdown:
Waterproofing £268
Floor £395
Ceiling & walls £559
Materials for flush door £73
Skimming £750
Skirting & architrave £128
Paint £248
Window & installation £600
Building regs application £165
Plumbing & electrics (inc downlights) £260
Vinyl flooring £249
Skip hire - £300
TOTAL CONVERSION COST - £3,995
Mirrors - £350
Sideboard - £150
Accent lighting - £200
Accessories - £100
TOTAL COST - £4,797
For more basement conversion ideas, take a look at my new room reveal where we created a stunning basement family space complete with home bar.
If you're planning your own DIY basement renovation or basement makeover, I'd love to hear about it - let me know in the comments! And if you need some design help, I offer an affordable online interior design service.